

Initiate a New Invoice
Click on the “Create Invoice” button. This will take you to a new page where you can begin entering the necessary information for your invoice.
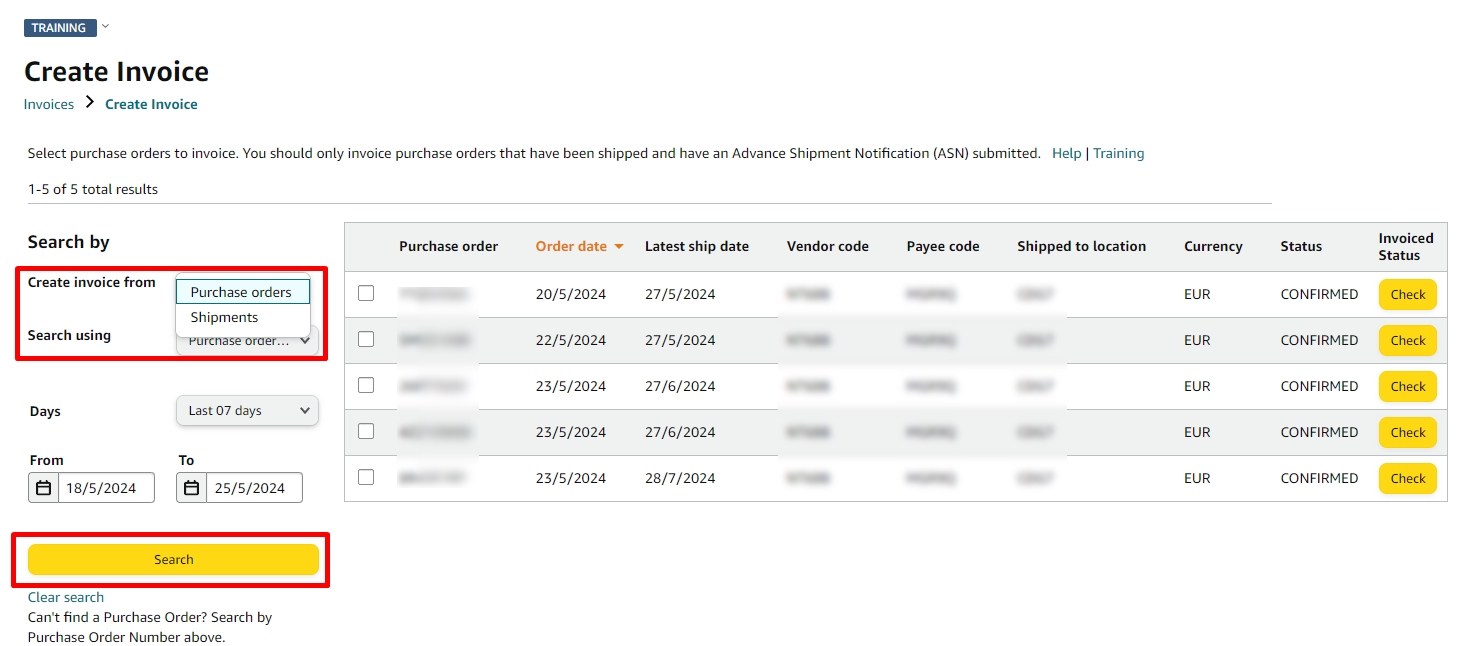
Invoice can either be created from PO or Shipment. Select the suitable option and click on ‘Create Invoice’. This will open a new window to submit the invoice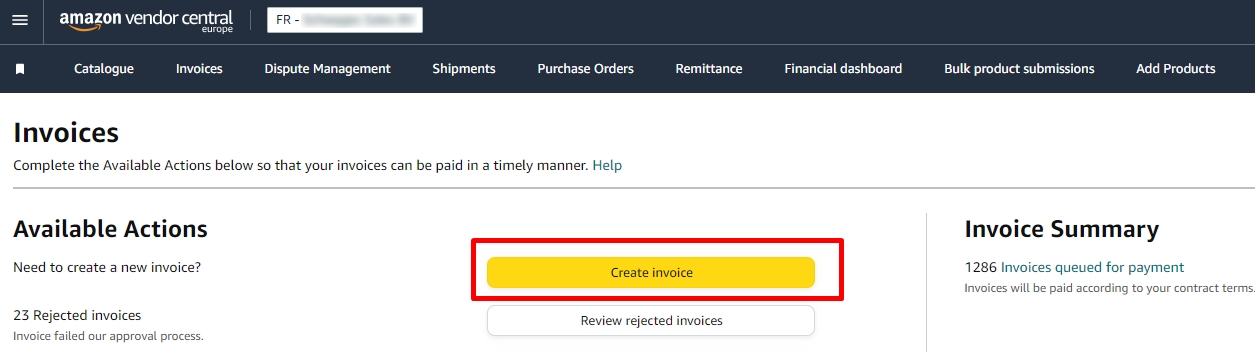
Enter Invoice Details
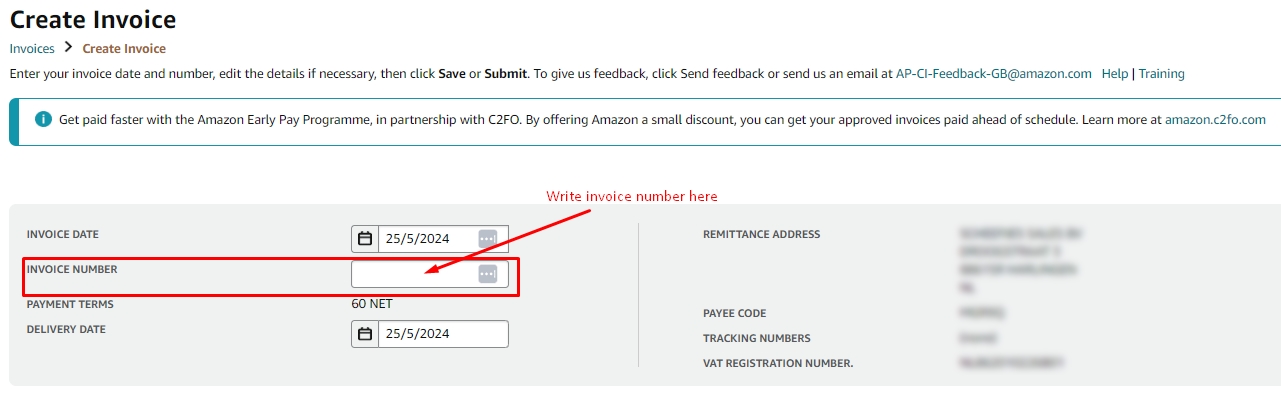
Invoice Number: Input your unique invoice number. This should be a number that you use internally to track your invoices.
Invoice Date: Set the date when the invoice is created after submission of ASN.
Shipment Number OR PO number: Include the shipment number OR PO number depending upon the option selected for creating an invoice and then tracking details, which helps in tracking the delivery associated with the invoice.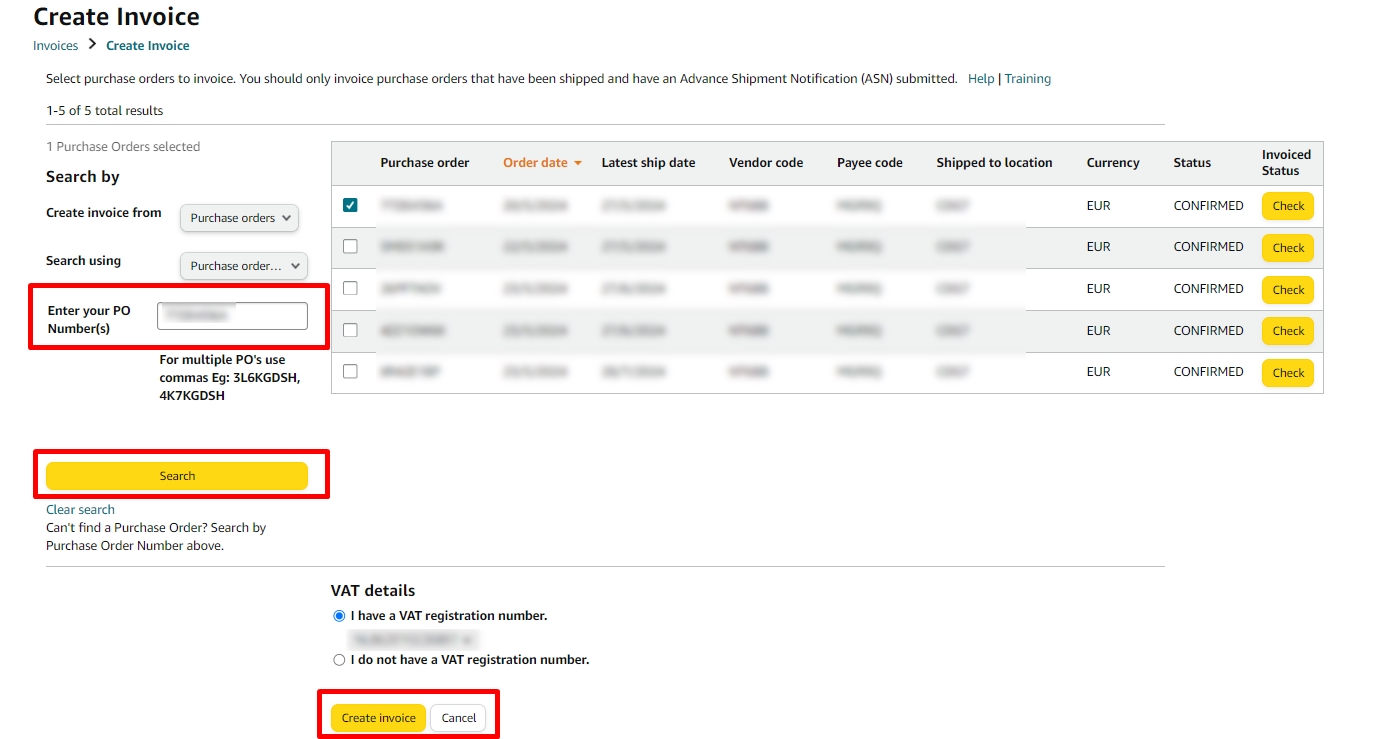
Confirm Item Details
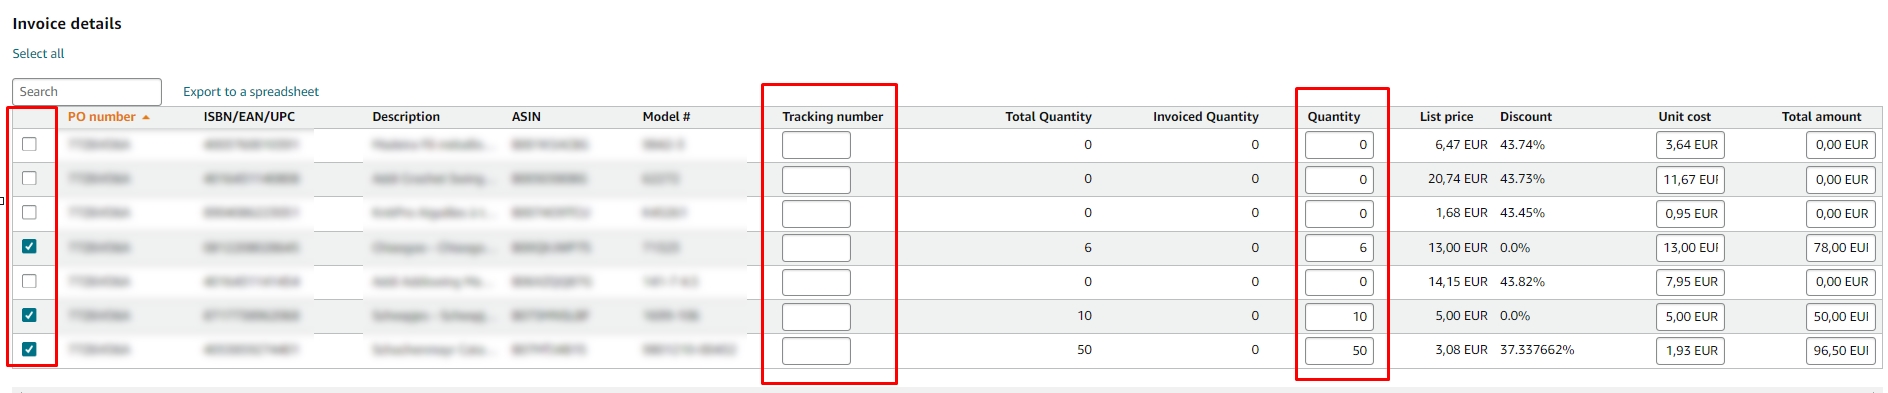
Item Description: Verify the ASIN, ISBN/EAN/UPC, title, and Model number for the item for which the invoice is being submitted.
Quantity: Specify the quantity of each item.
Unit Price: Indicate the unit price of each item.
Total Amount: The system will typically auto-calculate the total amount based on the quantity and unit price.
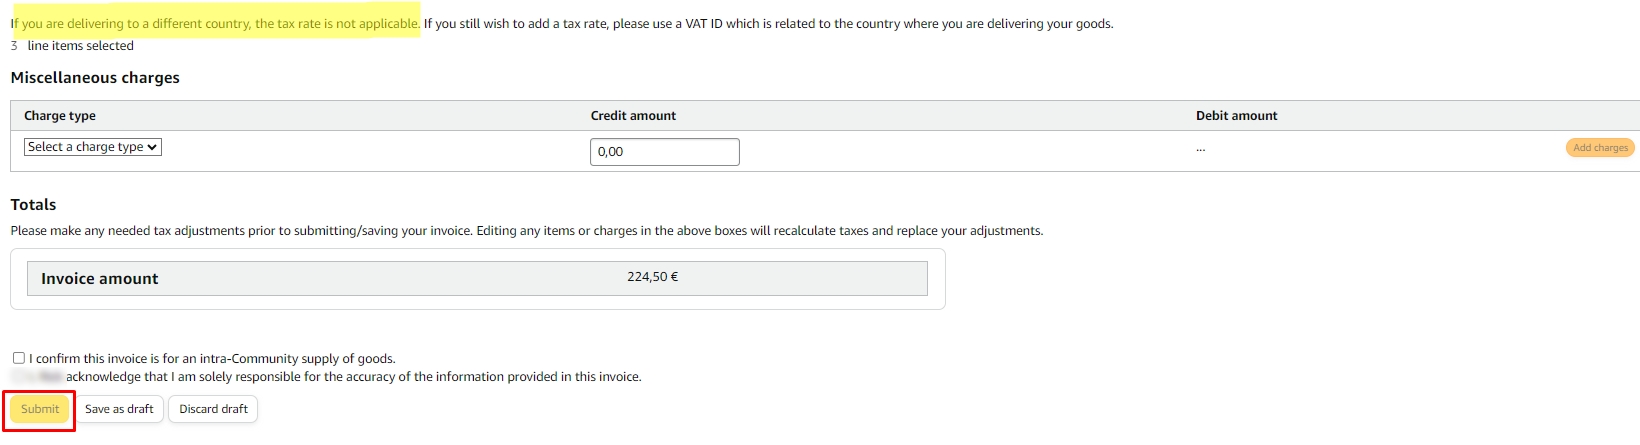
Include Additional Charges or Discounts
If there are any additional charges (like shipping) or discounts applicable, ensure these are accurately included in the designated fields. Double-check these entries to avoid any discrepancies.
Review and Submit
Carefully review all the entered information. Confirm that the invoice details match the purchase order and that all amounts are correct and click the Submit button.
Confirmation and Record-Keeping
After submission, you will receive a confirmation message indicating that your invoice has been successfully submitted. It is advisable to save a copy of this confirmation for your records.
Tips for Creating Accurate Invoices
Consistent Formatting: Use a consistent format for your invoice numbers and dates for easy invoice management.
Timely Submission: It’s recommended that invoices be created promptly after fulfilling the order or receiving the PO.
By following these steps, you can efficiently create invoices within Vendor Central and ensure a smooth payment process for your Amazon business.
Choose Staffcloud for seamless vendor management solutions. We handle everything from generating invoices and shipments for vendors to maintaining records of supporting documents for all Purchase Orders, managing disputes, and identifying issues such as over-deliveries or missing invoices. For more information, contact us at support@staffcloud.net or submit your inquiries here.