

When it comes to optimizing your e-commerce strategy, leveraging kit types can be a game-changer. By bundling two products in a kit, you not only enhance the shopping experience for your customers but also streamline your inventory management. Let’s dive into the three types of kit relationships and explore how to make the most of them.
Choosing Your Kit Type
The Inventory Relationship between Kit Parent and Components is pivotal, and it depends on the Kit Type selected. Before you embark on creating and configuring your kit products, familiarize yourself with the three distinctive kit types.
All Component Kit: Perfect Harmony
Opt for the All Component kit type when all components are essential to create the final product. The inventory of the parent is tied to the component with the least available units. While components maintain individual counts, they share this count with the parent. If any component runs out of stock, the entire kit’s inventory becomes zero.
Main Component Kit: Core Focus
Select the Main Component kit type when there’s one crucial product for the final assembly, and the rest are supplementary or interchangeable. The parent’s inventory is drawn solely from the Main Component, and like the All Component kit, if the main component runs out of stock, the kit inventory becomes zero.
Independent Kit: Unleash Freedom
For ultimate independence, choose the Independent Kit type. The parent’s inventory is entirely independent of the components. During sales, kit sales won’t affect component inventory, and vice versa. However, Independent Kits require assembly to have any inventory.
Let’s illustrate the process of creating an All Component Kit with a practical example.
Imagine you’re selling posters and want to offer customers the option to purchase a standalone poster or a poster with a frame. The challenge is to keep the inventory synchronized for both variations. In such a scenario, the “All Component Kit” is the ideal solution. This means that the inventory of the poster is linked to its component, the frame. If the Poster or frame runs out of stock, the overall inventory of the entire kit is reset to zero.
We will kit the plain poster as the parent and the framed version as the child component in a step-by-step manner.

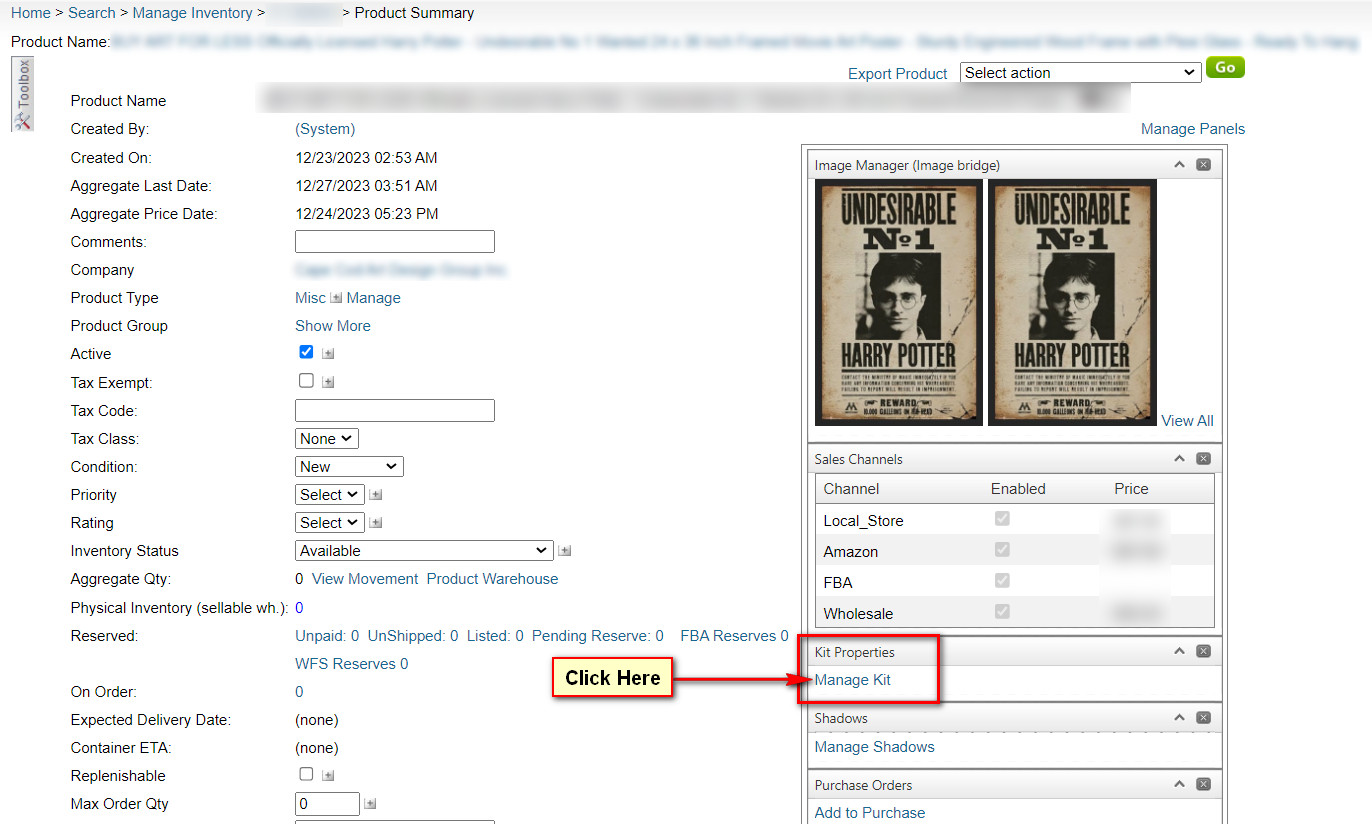
We want the framed version of that product as the child component. Simply click on the product title to open it in a new tab, where you will see the product summary page.
Locate the Kit Properties in the right side panel and then click on Manage Kit.
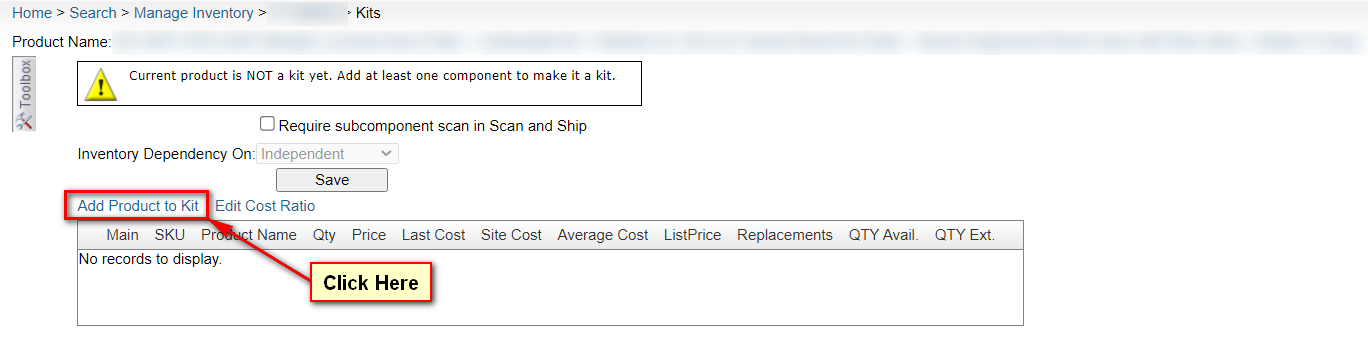
You will be redirected to the Kit page. Find the ‘Add Product to Kit‘ option and click on it.
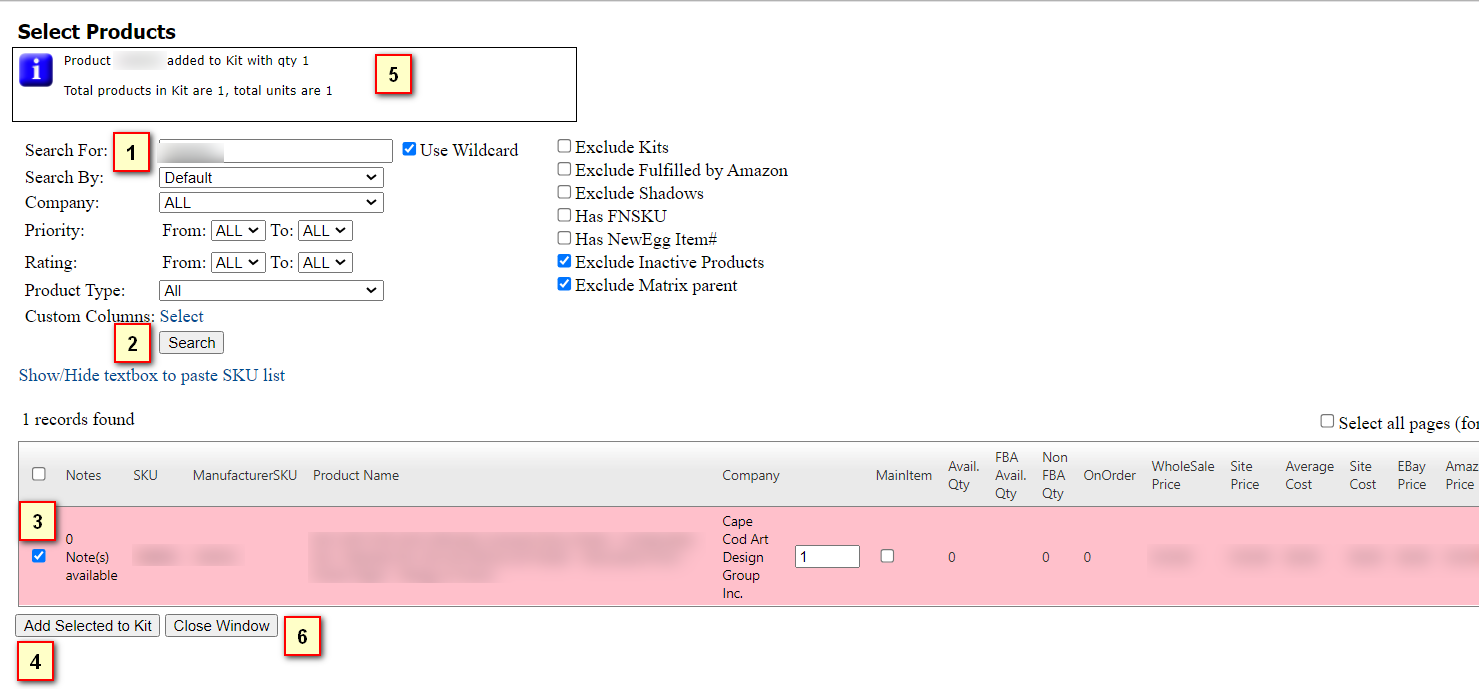
You will have a pop-up window. The following steps need to be taken:
- Locate the product SKU for the parent product to kit it into.
- Select the search button.
- Confirm the presence of the product in the search results and mark it with a checkmark.
- Click on the ‘Add Selected to Kit‘ button.
- You’ll get a message saying your product has been added to the kit.
- Just click the ‘Close Window‘ button to go back to the kit page.
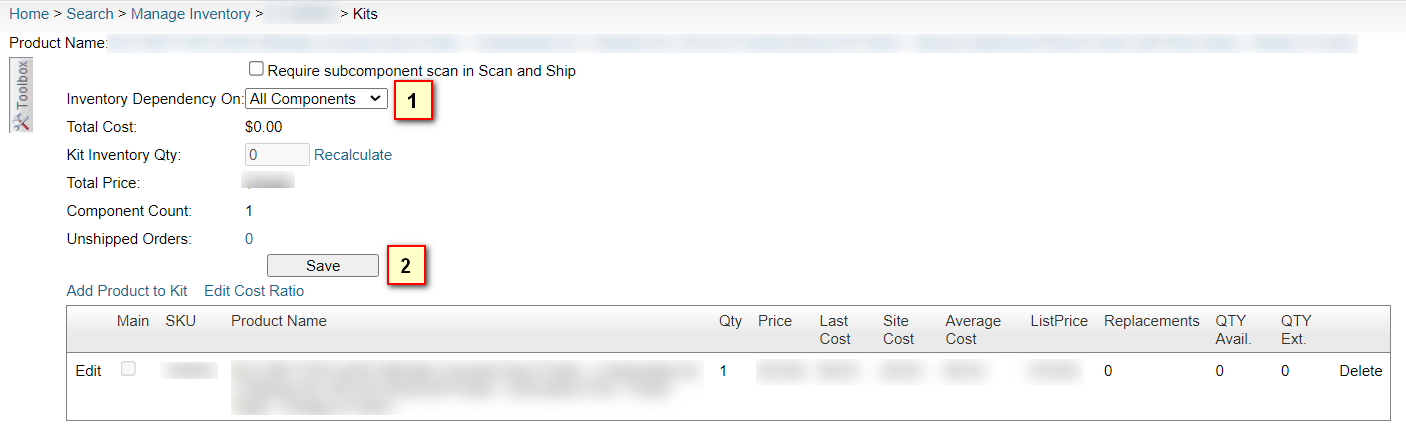
Your product will appear under the kit list on the kit page.
- Make sure the inventory dependency is set to ‘All Components.’
- Click the ‘Save’ button to save the kit.
After successfully adding the kit, you can return to the product summary page.
On the product summary page
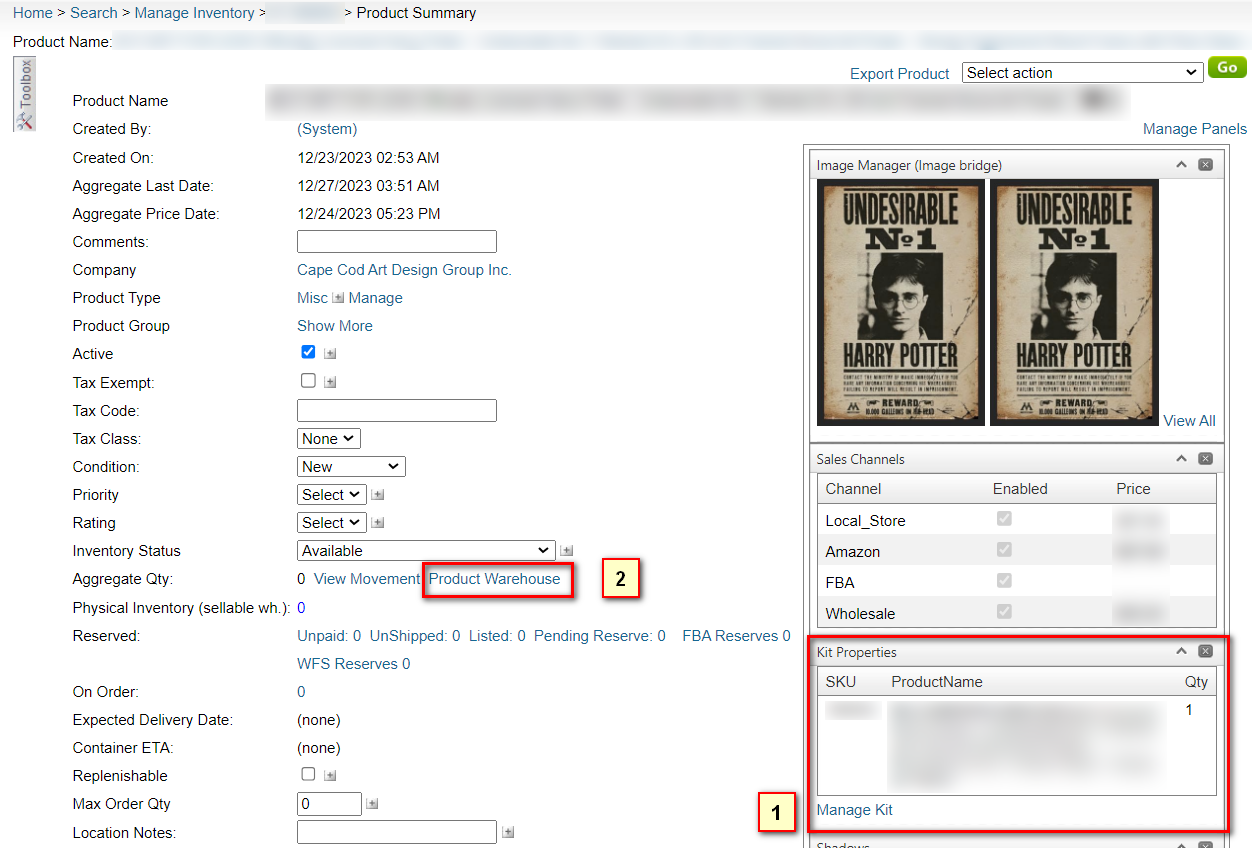
- Now you can see the parent product in the ‘Kit Property’ section.
- If you want to update the inventory of this kit, just click on ‘Product Warehouse‘ in the Aggregate Qty section.
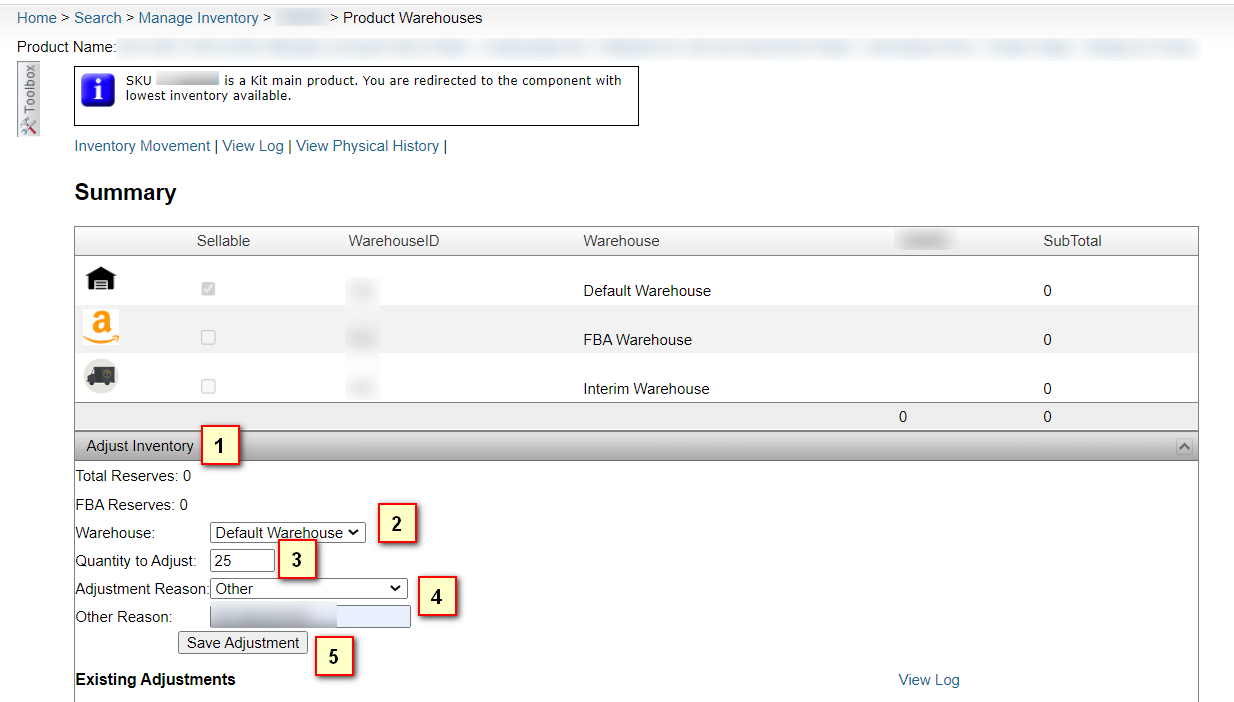
It automatically redirects the page to the parent product ‘Product Warehouse‘ page.
- Click on the ‘Adjust Inventory‘ section.
- Choose your desired warehouse from the list.
- Add the quantity of the product.
- Describe the reason for adjusting the quantity.
- Click on the ‘Save Adjustment‘ button.
Your inventory quantity will be saved for both the parent and child products.
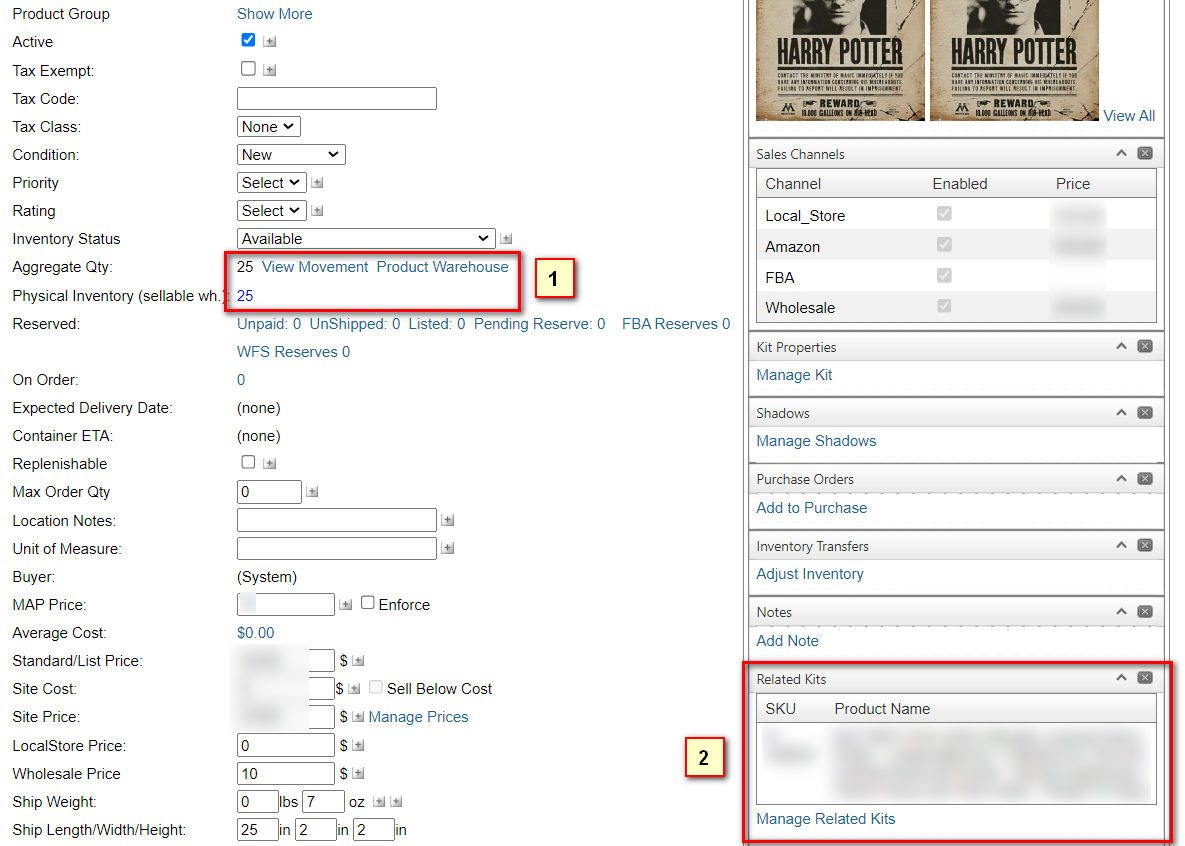
When we go to the parent product summary page:
- Aggregate Qty is shown as updated.
- The child product is displayed in the ‘Related Kit’ section.
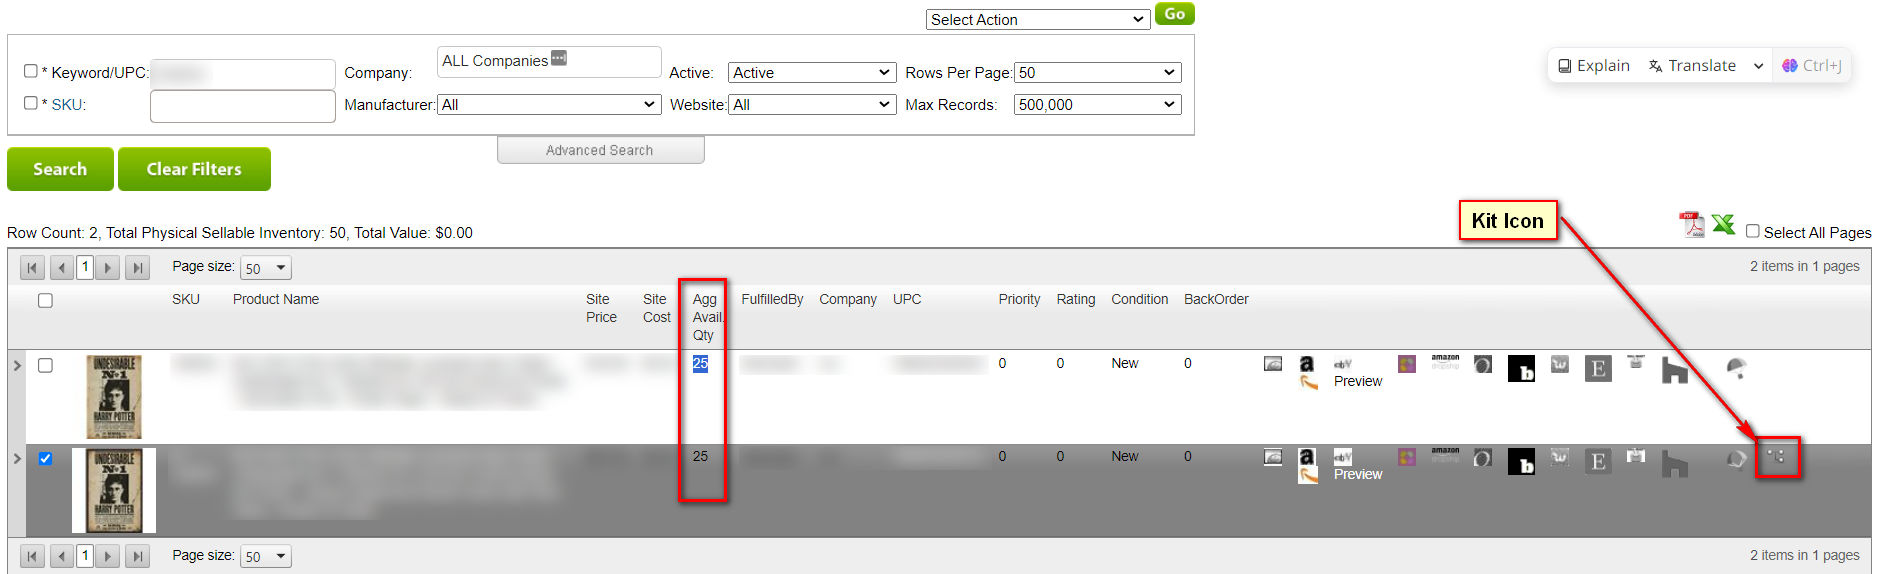
After successfully adding the kit
The child product shows a KIT icon in the ‘Manage Inventory’ search results.
The quantity is set the same for both. If the parent product is sold, the child product quantity will also reduce; or if the child product is sold, the parent product quantity will reduce. Both product quantities will be synchronized automatically after creating the kit.
By mastering the art of kit types on Sellercloud, you not only enhance your e-commerce capabilities but also provide a more efficient and streamlined shopping experience for your customers. Explore these kit types, set defaults wisely, and unlock the full potential of bundled products in your online store.
Explore the specialized SellerCloud support services offered by StaffCloud.net. Our skilled experts are adept at handling essential tasks such as data entry, inventory management, and customer support. Trust us to optimize your business operations and propel you toward success. Contact StaffCloud today for expert assistance in leveraging the power of Sellercloud.