

Upon uploading a product on Amazon or any platform, Seller Cloud will automatically fetch the details and image thumbnail. Additional images can be uploaded through the provided process. Below, you’ll find detailed instructions for both manual and bulk image uploads for your convenience.
Manual Process
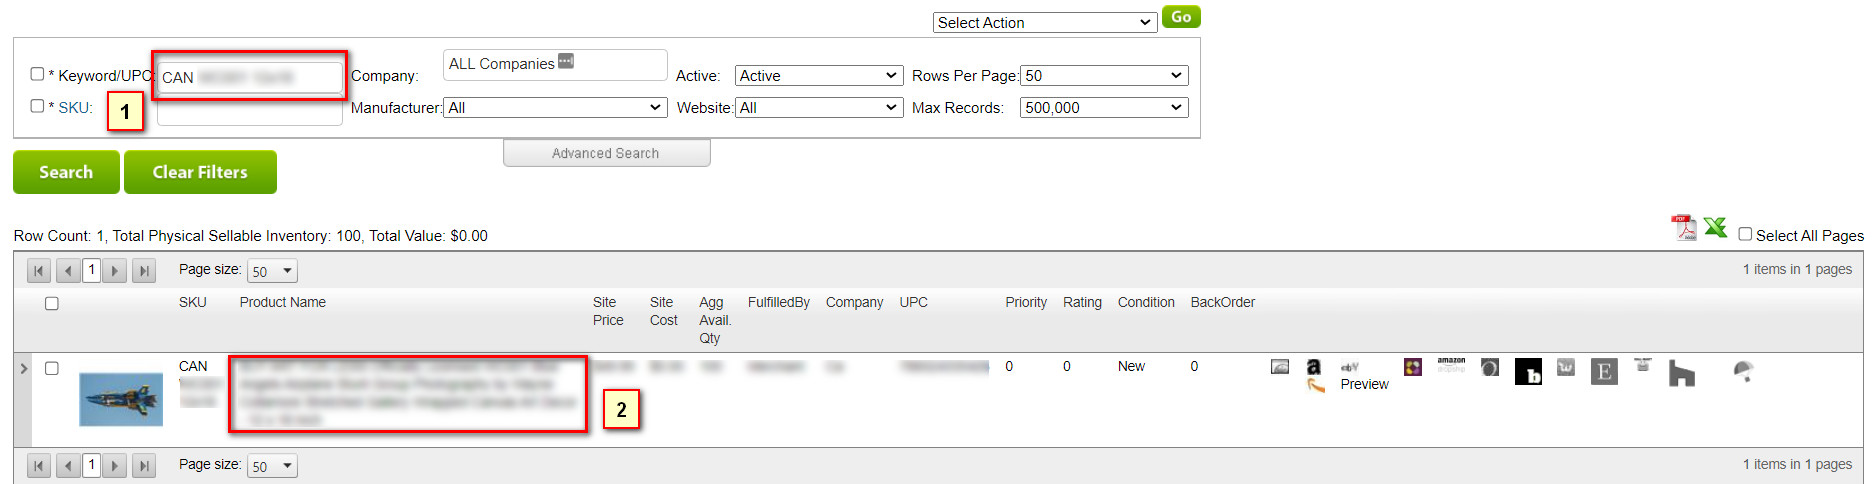
- Enter the SKU/UPC or keywords to search for the product, then click on the search button.
- When you see the search results, click on the product title to open the product summary page in a new tab.

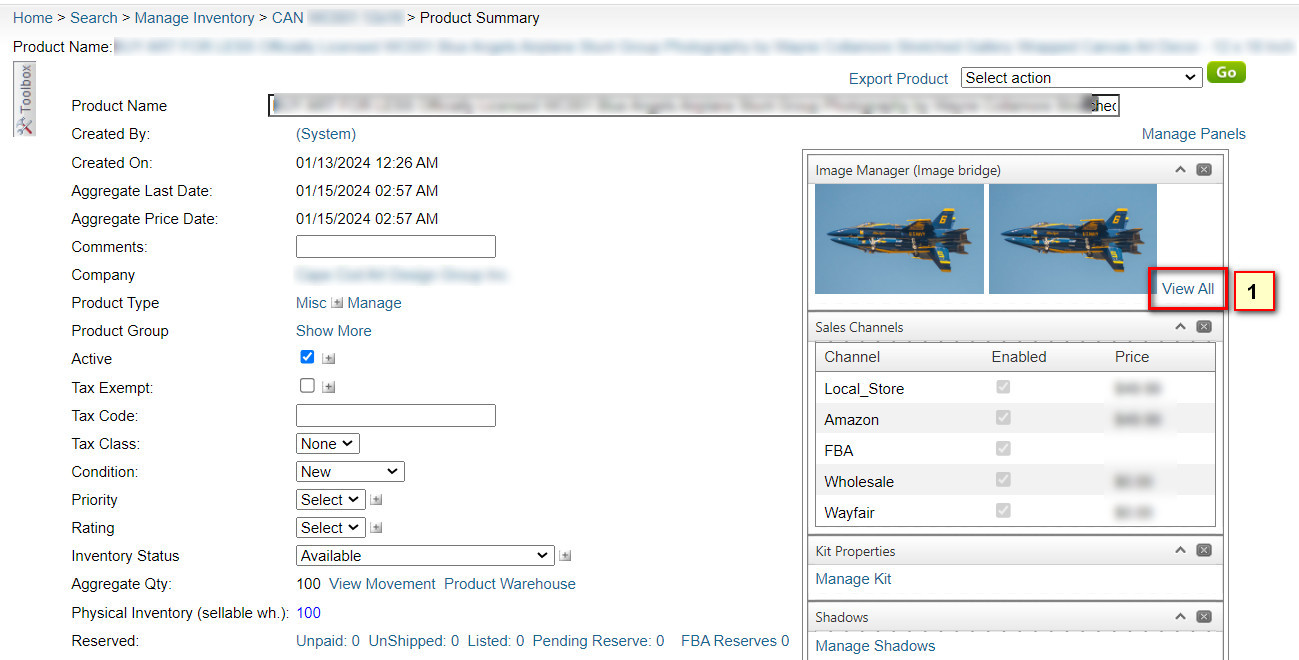
- On the product summary page, locate the image section in the right-side panel and click on ‘View All’. This will redirect you to the image manager page.

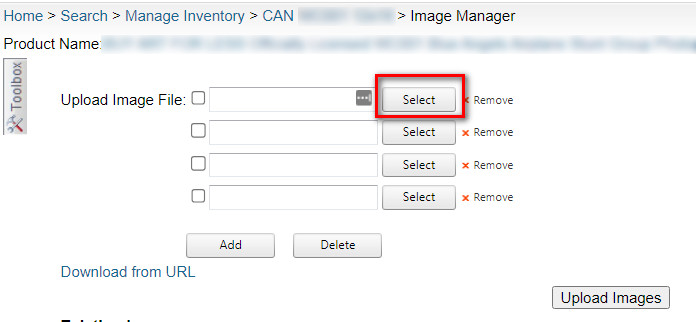
You can upload images on the image manager page in two ways, as outlined below:
Method 1
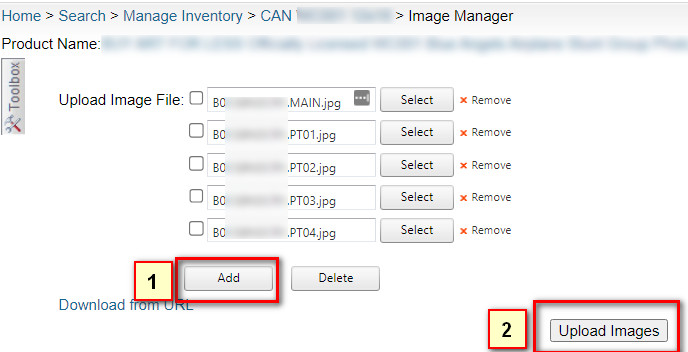
Select images from your local drive by clicking the Select button.
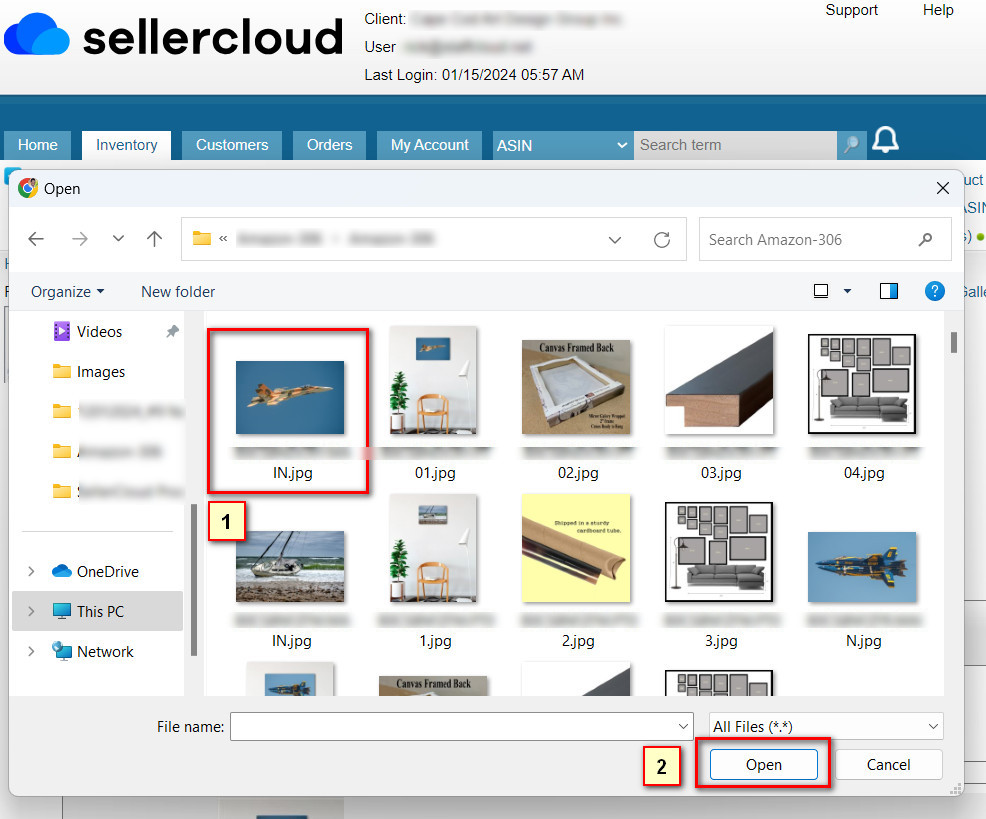
Choose all the images from your local computer.
- You can add more images by clicking the ‘Add‘ button.
- After selecting all images, click on the ‘Upload Images’ button.

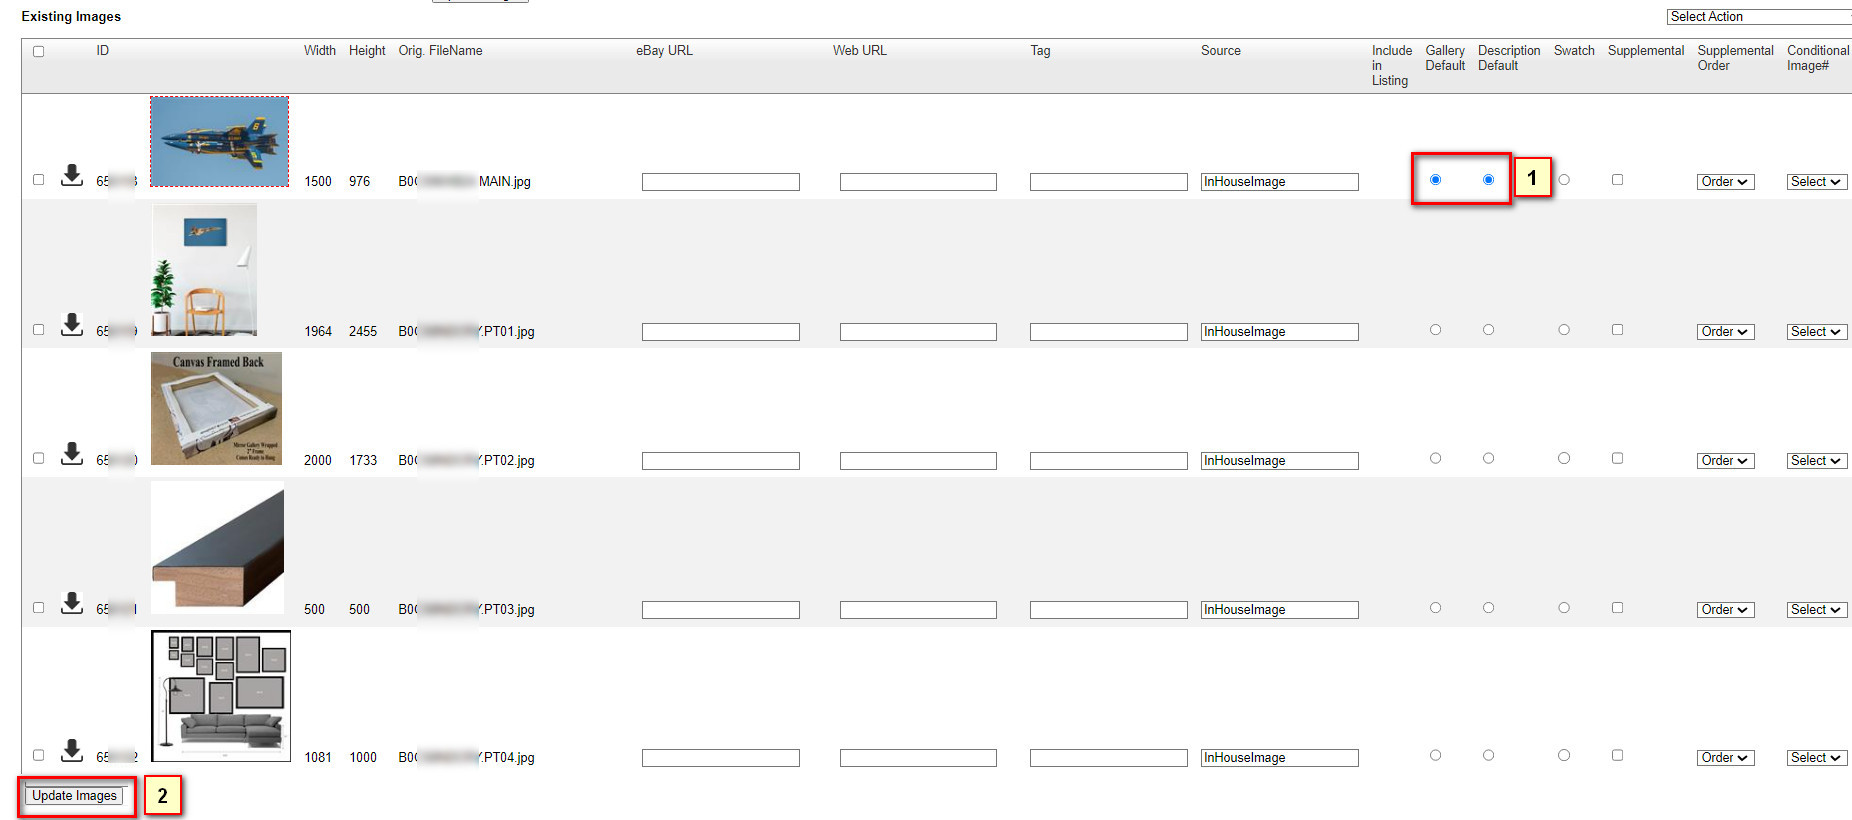
- Once the image is uploaded, be sure to select the ‘Gallery Default’ and ‘Description Default’ checkboxes.
- Then, click the ‘Update Images’ button.

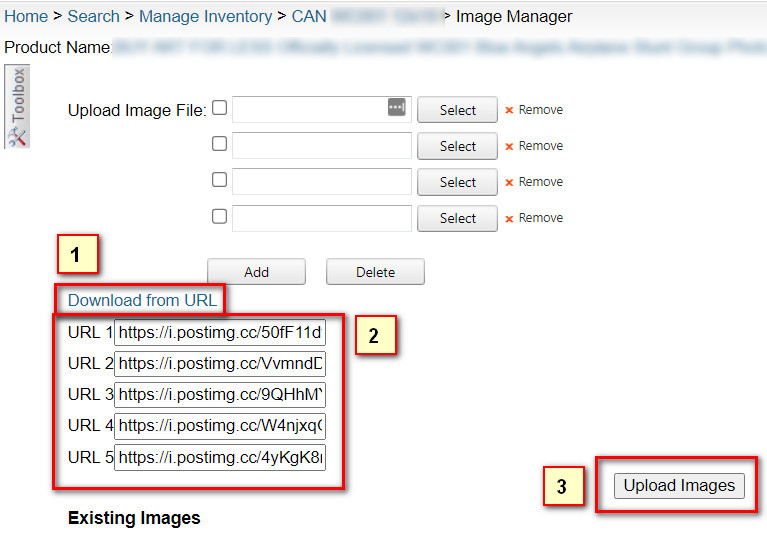
Method 2
If you possess image URLs, you can follow these steps as well:
- Select ‘Download from URL.’
- Input the image URL into the designated field.
- Click the ‘Upload Images’ button.

Bulk Upload Process
If you have image URLs, you can upload multiple images using the following steps.
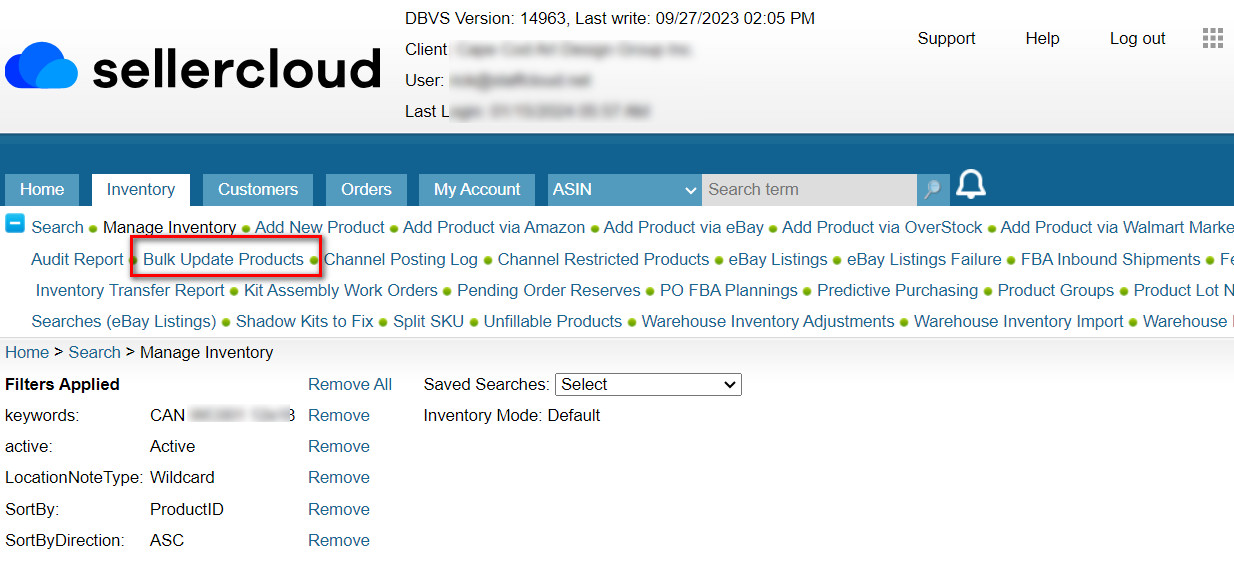
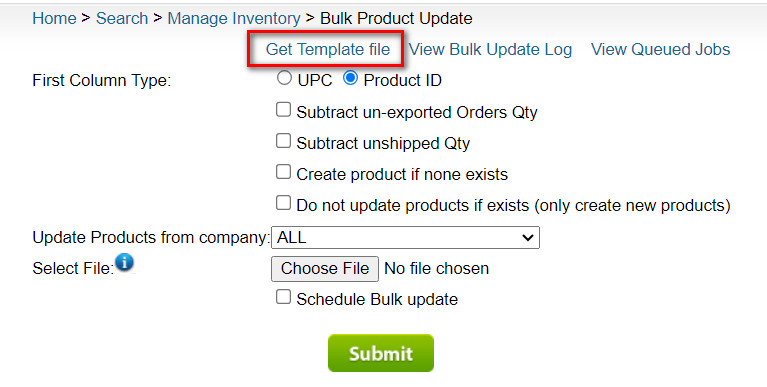
Locate the ‘Bulk Update Products’ in the inventory section and click on it. This will redirect you to the ‘Bulk Product Update’ page.
On the ‘Bulk Product Update’ page, click on ‘Get Template file’, which will open a new pop-up window.
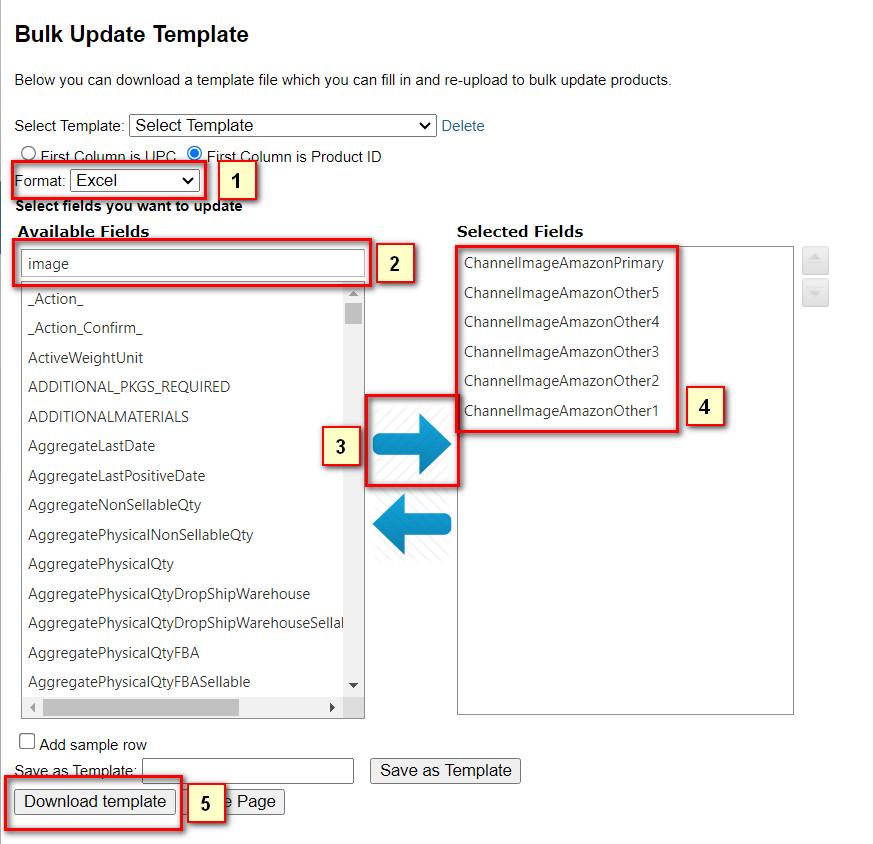
 Now, we need to download the bulk upload template with the required fields.
- Choose the file format, such as Excel.
- Use the field search box to look for ‘Image’, and select the ‘ChannelImageAmazon’ field as shown in the screenshot.
– ChannelImageAmazonPrimary
– ChannelImageAmazonOther1
– ChannelImageAmazonOther2
– ChannelImageAmazonOther3
– ChannelImageAmazonOther4
– ChannelImageAmazonOther5
- Click on the right arrow, and the page will reload.
- The selected fields will be displayed on the right side.
- Click on ‘download template’.
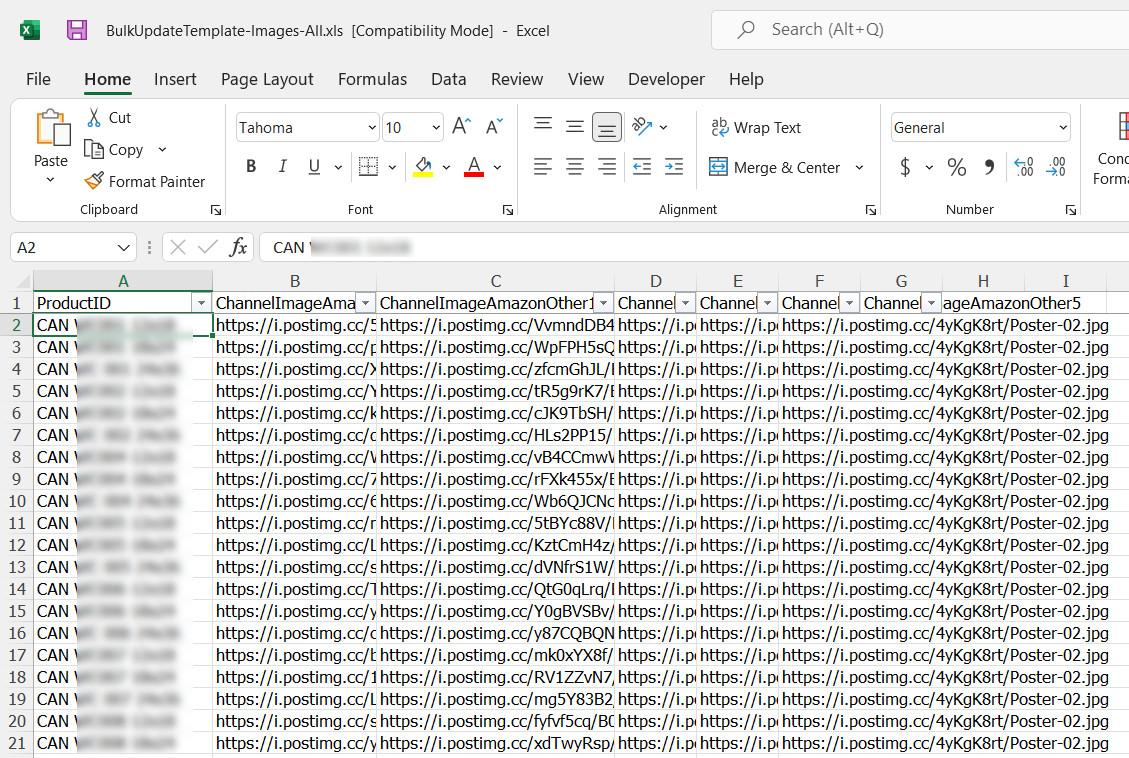
 In the BulkUpdate-Template excel sheet, you should include the ProductID/SKU in column A and the image URLs in columns B to H.
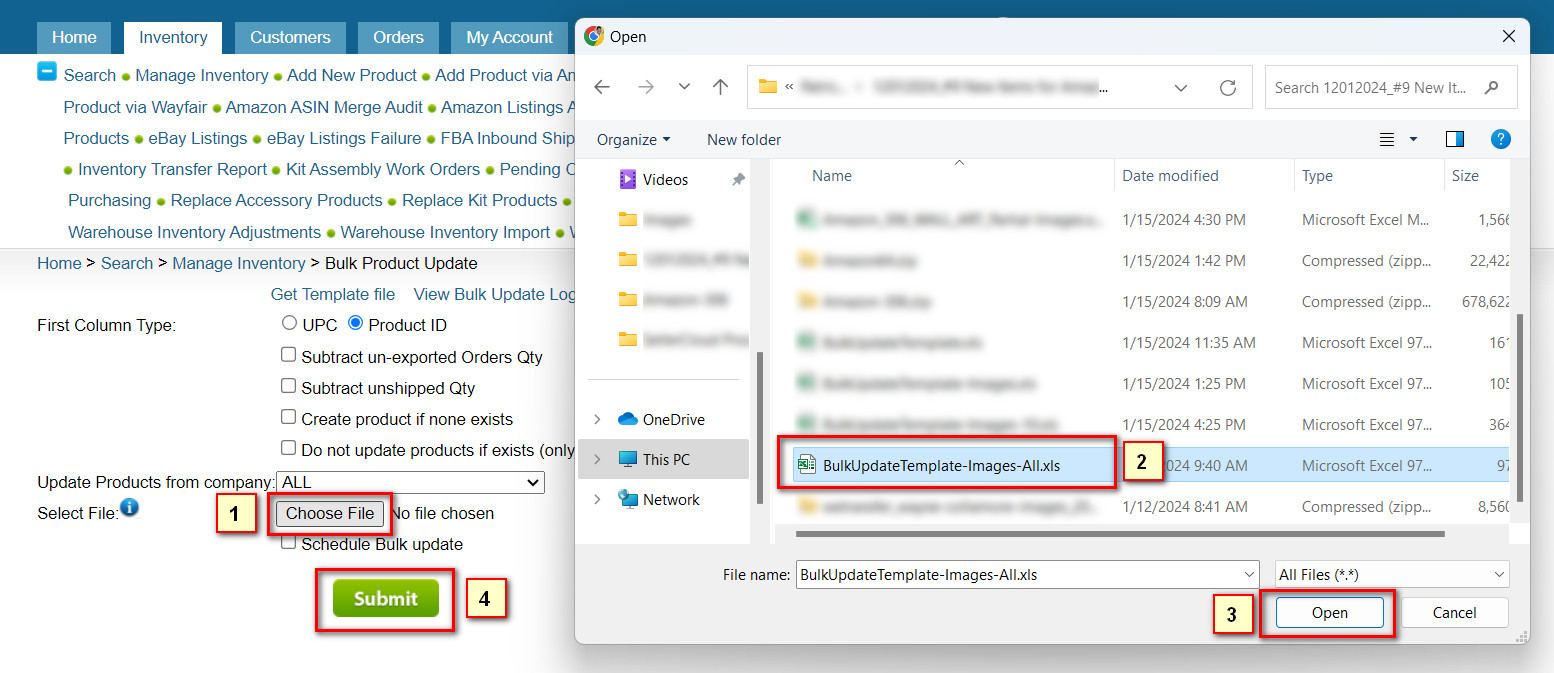
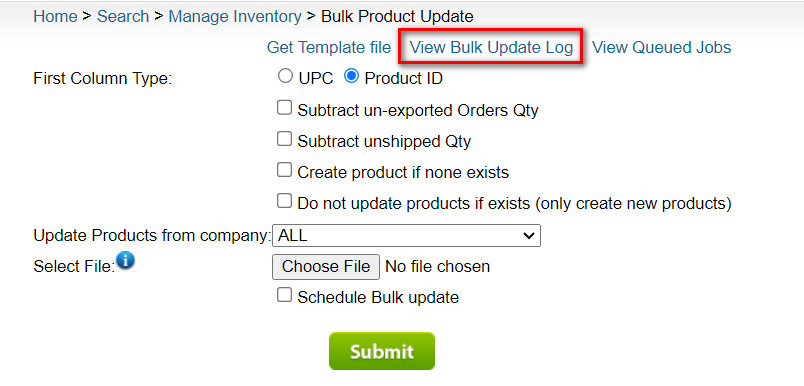
 Go back to the ‘Bulk Product Update’ page and follow these steps:
- Click the choose button.
- Choose the ‘BulkUploadTemplate’ excel sheet.
- Open the file.
- Click the submit button.
You can also view the ‘Bulk update log’ by clicking here.
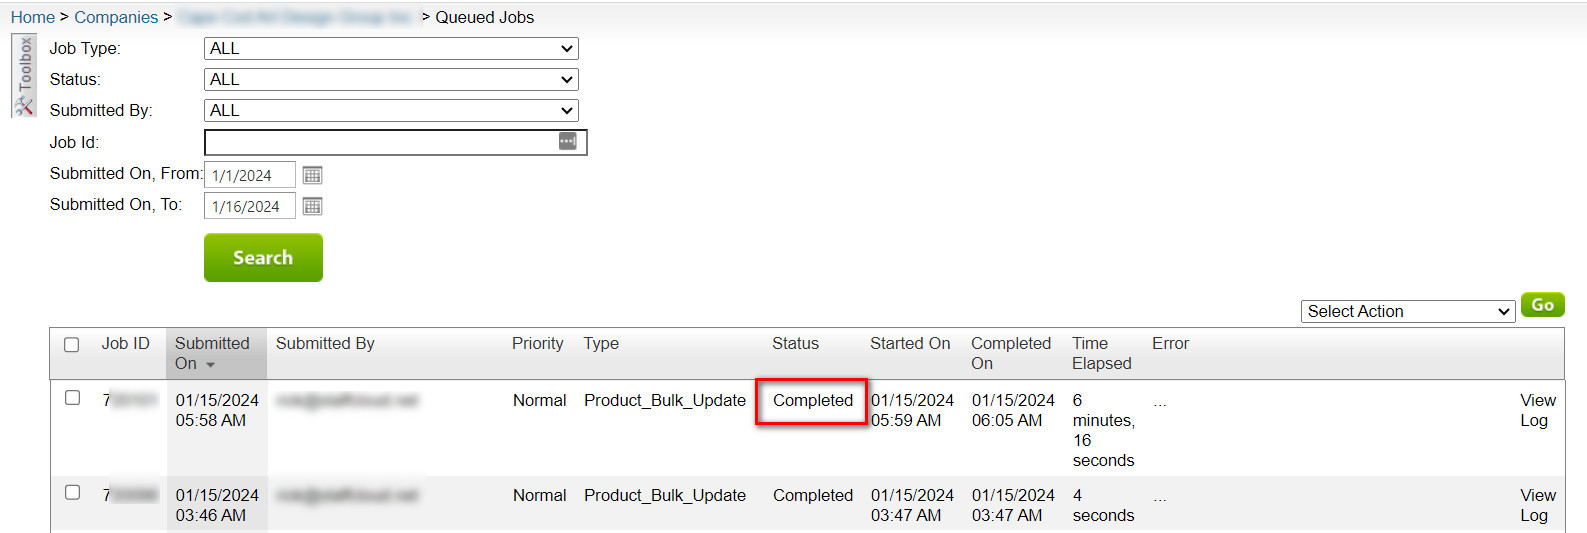
 On the queued job page, wait for the status to show ‘Complete’. Once the status indicates ‘Complete’, your bulk images have been successfully uploaded.
Discover the tailored support services for SellerCloud provided by StaffCloud.net. Our proficient specialists excel in managing crucial responsibilities like data entry, inventory management, and customer support. Rely on us to enhance your business operations and guide you toward success. Reach out to StaffCloud today for expert assistance in harnessing the capabilities of SellerCloud.