

Xero isn’t just another accounting software; it feels like having a friendly, helpful assistant by your side as you navigate the ups and downs of running a business. Imagine it as a trusty companion that takes the stress out of managing your finances. With Xero, you can easily keep track of your accounts, send invoices, and get a clear picture of your financial health—all in one place. It’s designed to be simple and intuitive, so you don’t need to be a finance expert to use it. Whether you’re a small business owner, a freelancer, or just someone who wants to stay on top of their finances, Xero is here to make your life easier and your business run smoother.
Creating an invoice in Xero is a breeze. Let’s walk through the steps together, so you can start sending invoices quickly and effortlessly.
1) Once logged into Xero, the interface resembles the image provided below. Summarize the details of your invoices, which are shown on this page.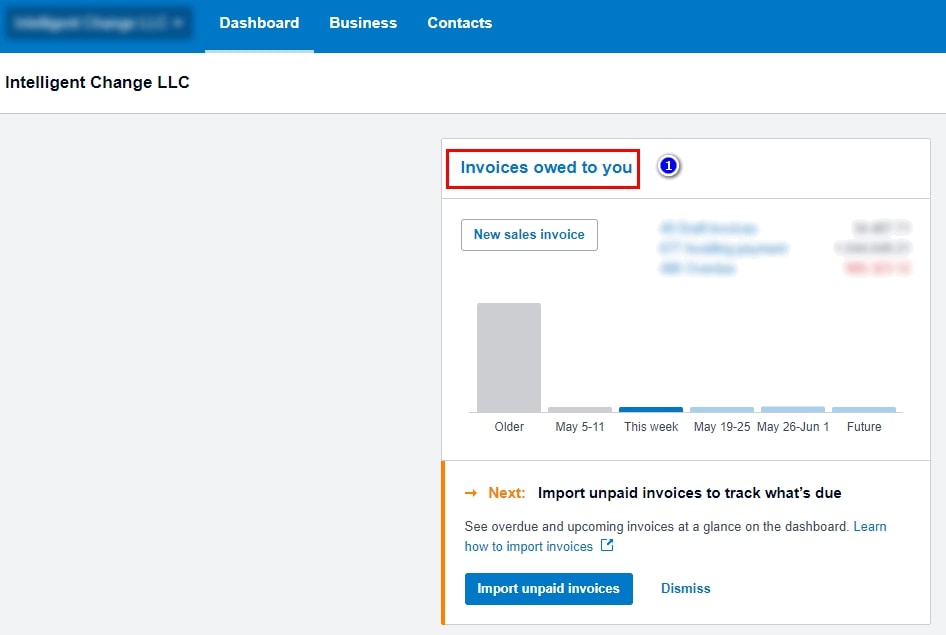
2) Billing information is also displayed on the interface after we login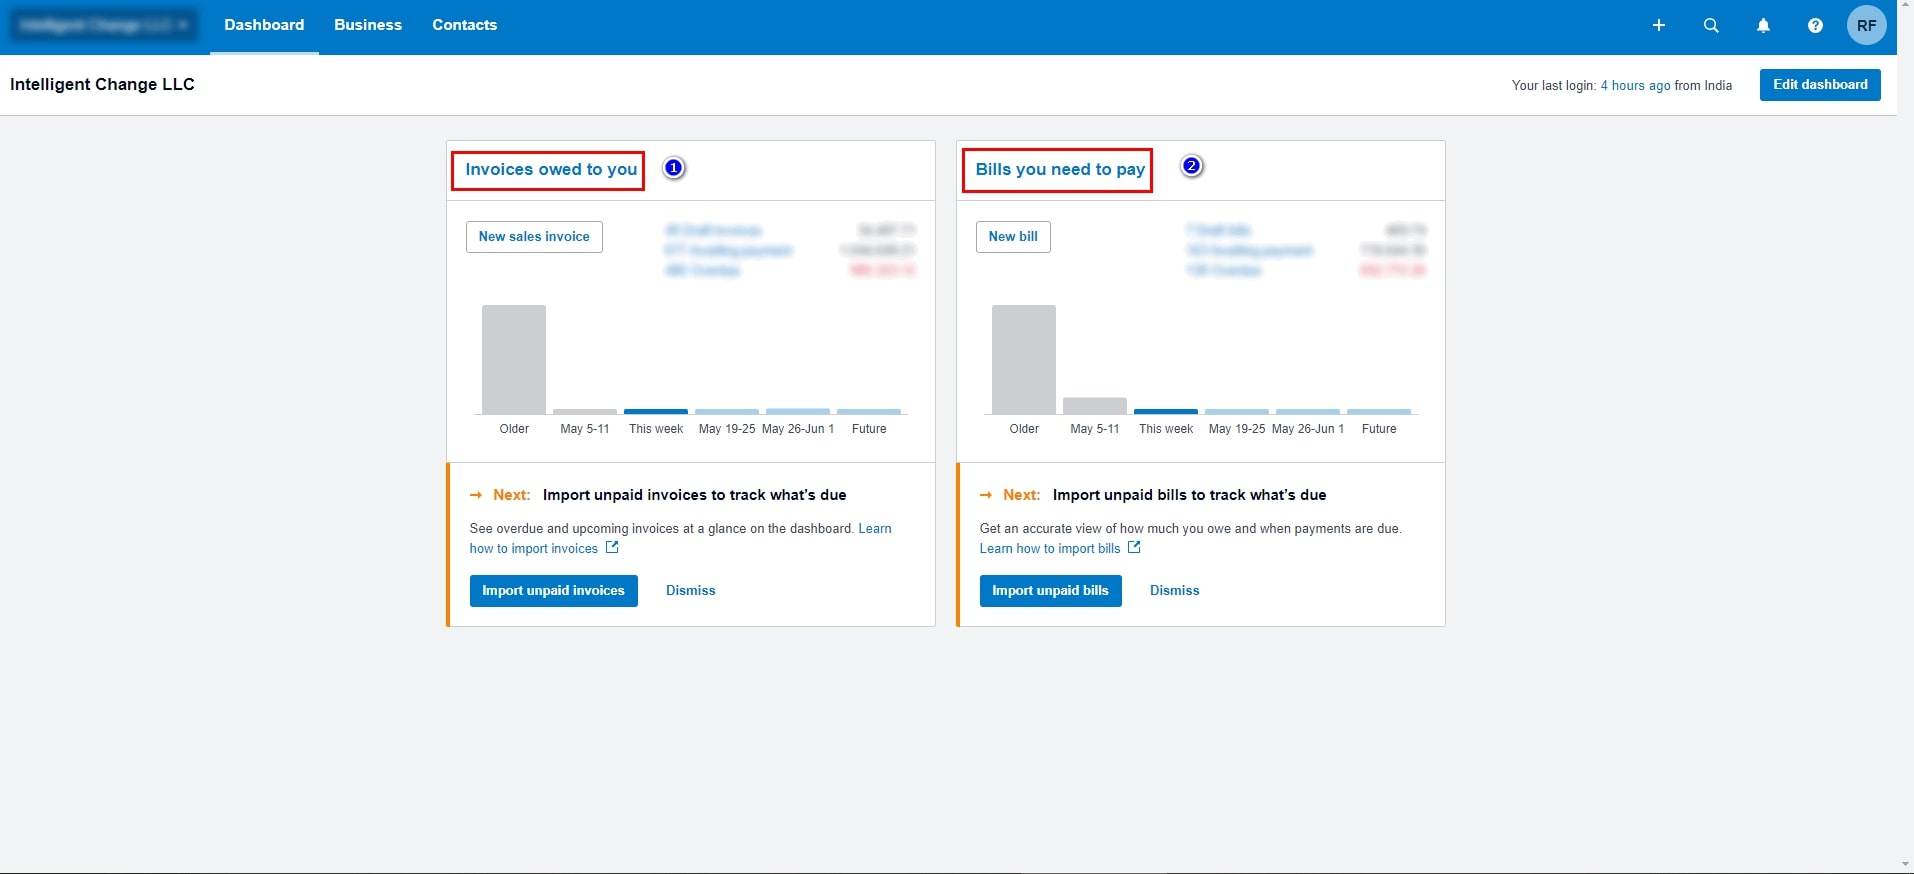
3) To create an invoice, we need to choose the Business option, followed by selecting Invoices. Click on the Invoices option from the dropdown.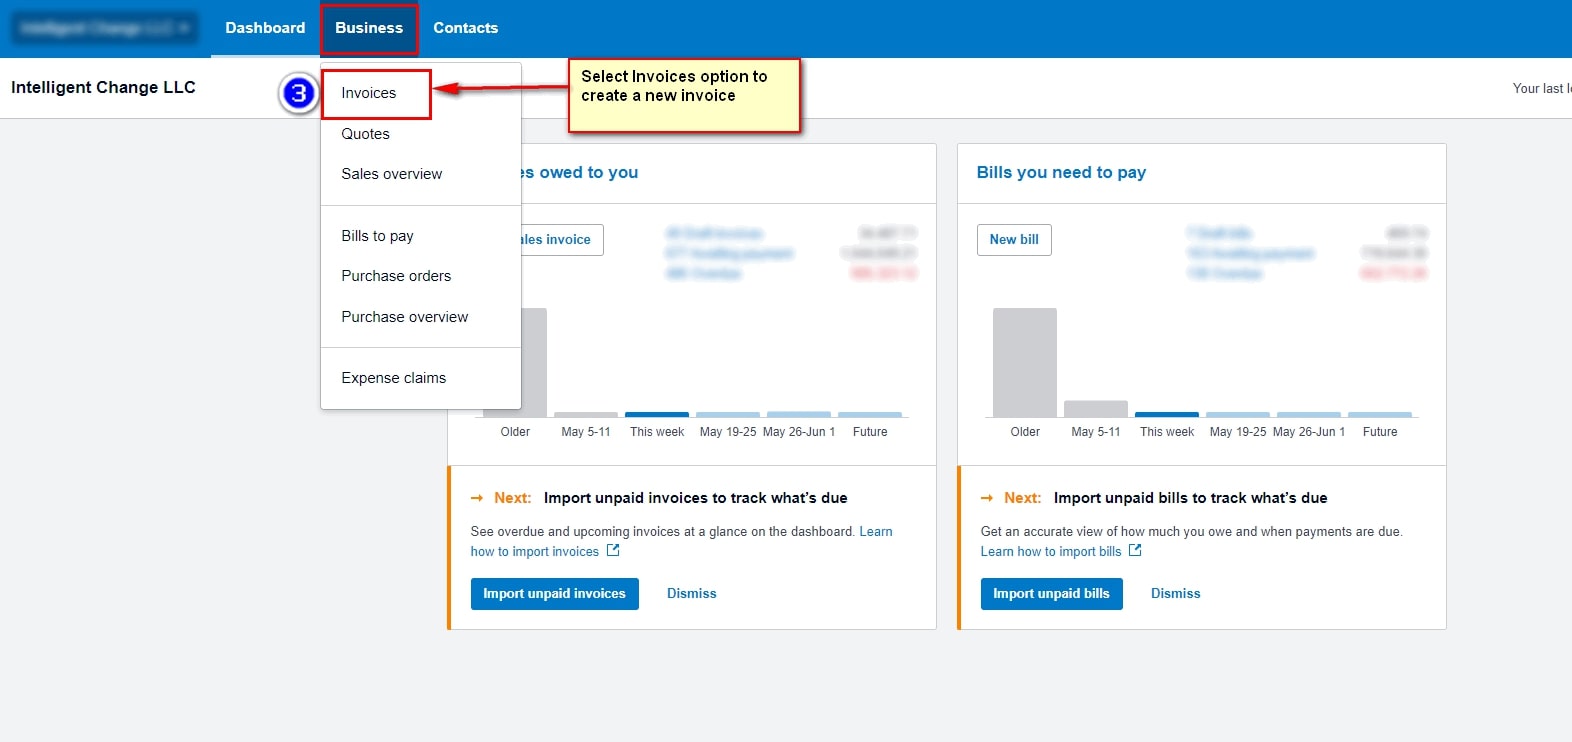
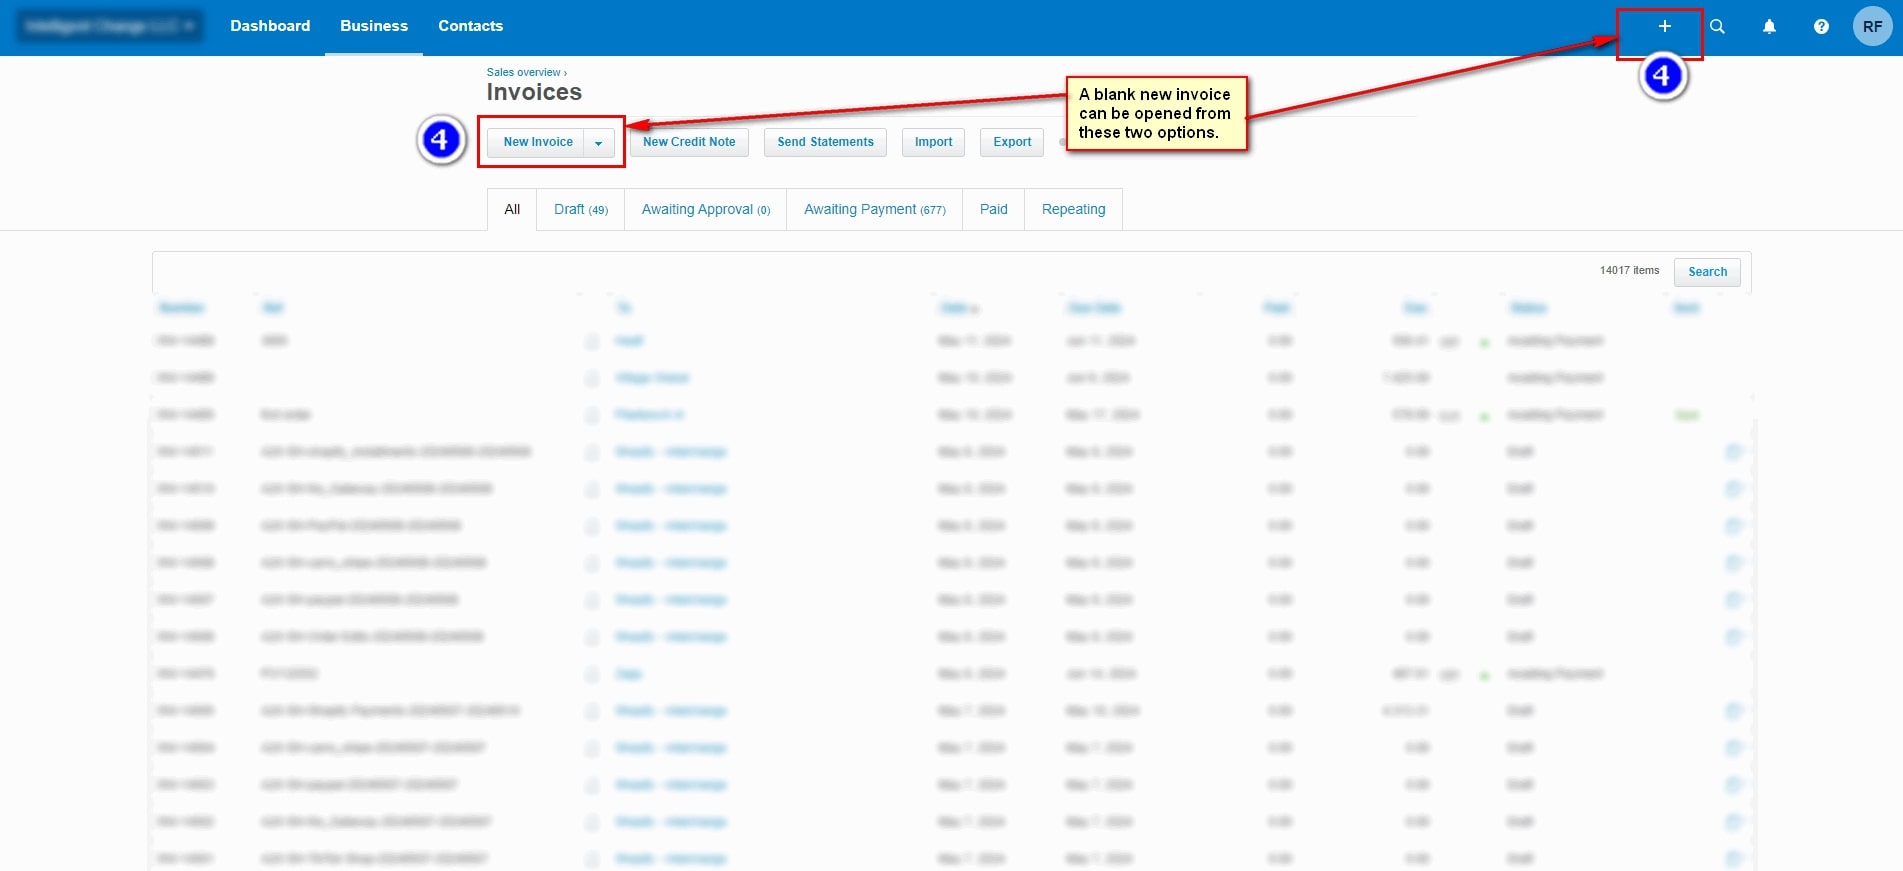
4) After clicking the Invoices under the Business option the interface looks like this
- New Invoices:- Once you click on this button a new blank Invoice will appear.
- The”+” button:- A blank new invoice can also be created using this button

5) Once the blank invoice is opened, we will proceed to input the details based on the customer’s purchase order. The blank invoice interface resembles this. Initially, we’ll choose the customer’s name, which will be sourced from Xero’s saved address book. If not added to the address book, we can also add it here while creating the invoice.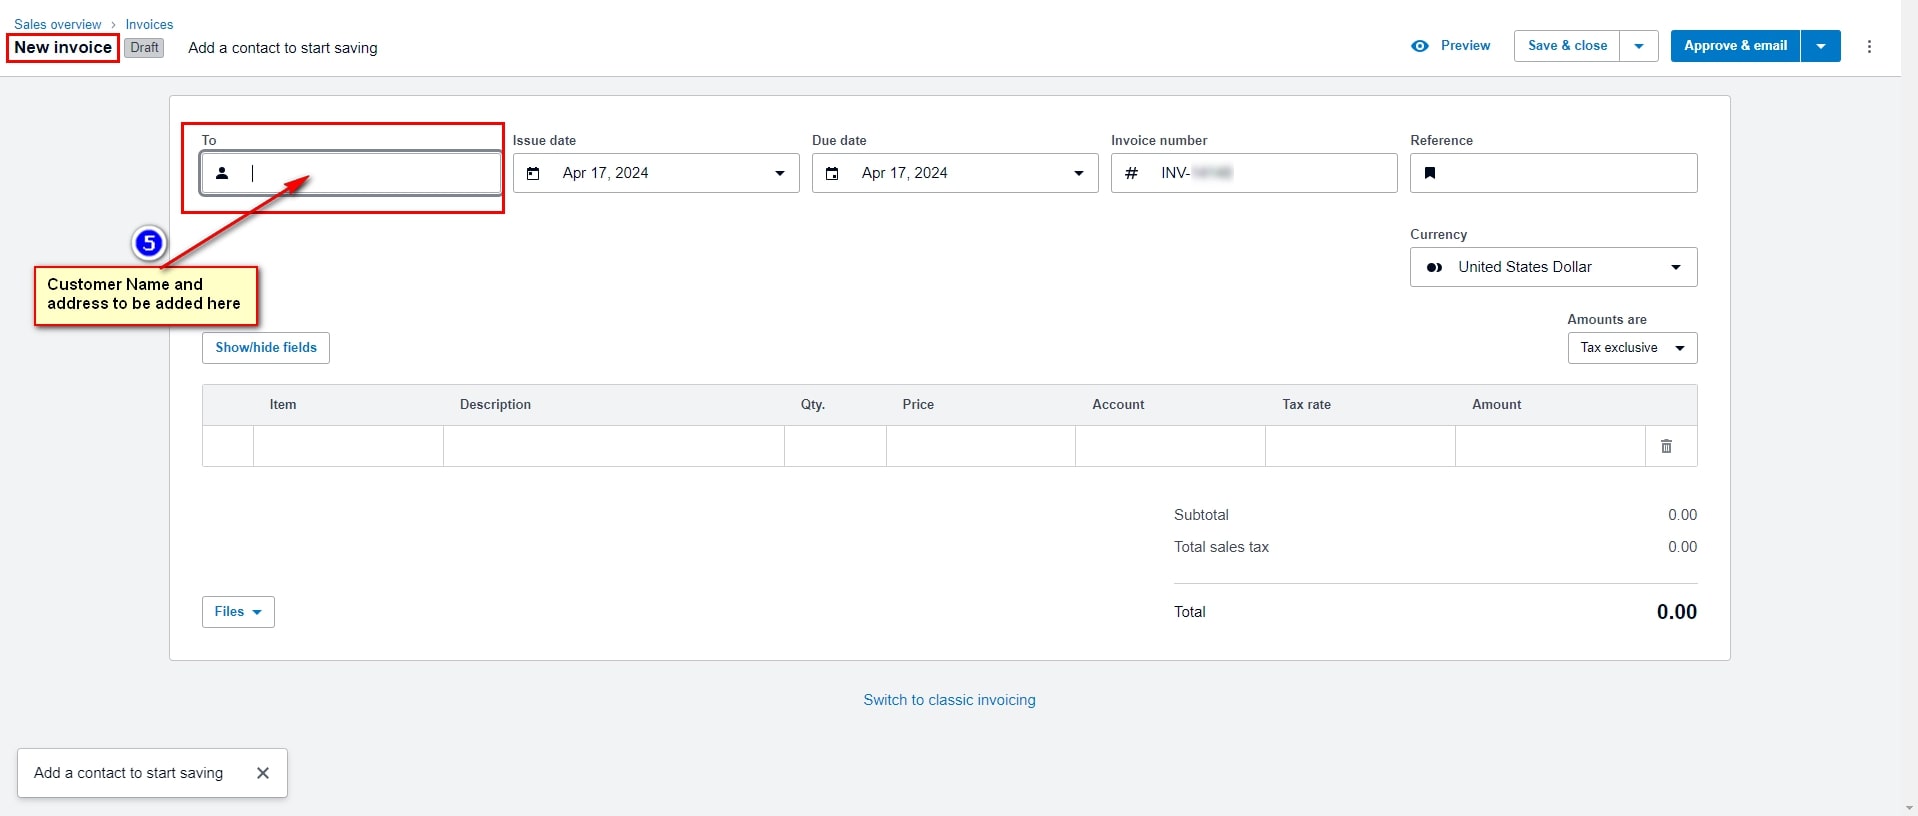
6) Next, we’ll pick the Issue Date, marking the day the order was placed by the customer. Then, we’ll set the Due Date, indicating when the product can be shipped. This due date typically falls either 30 or 60 days after the issue date.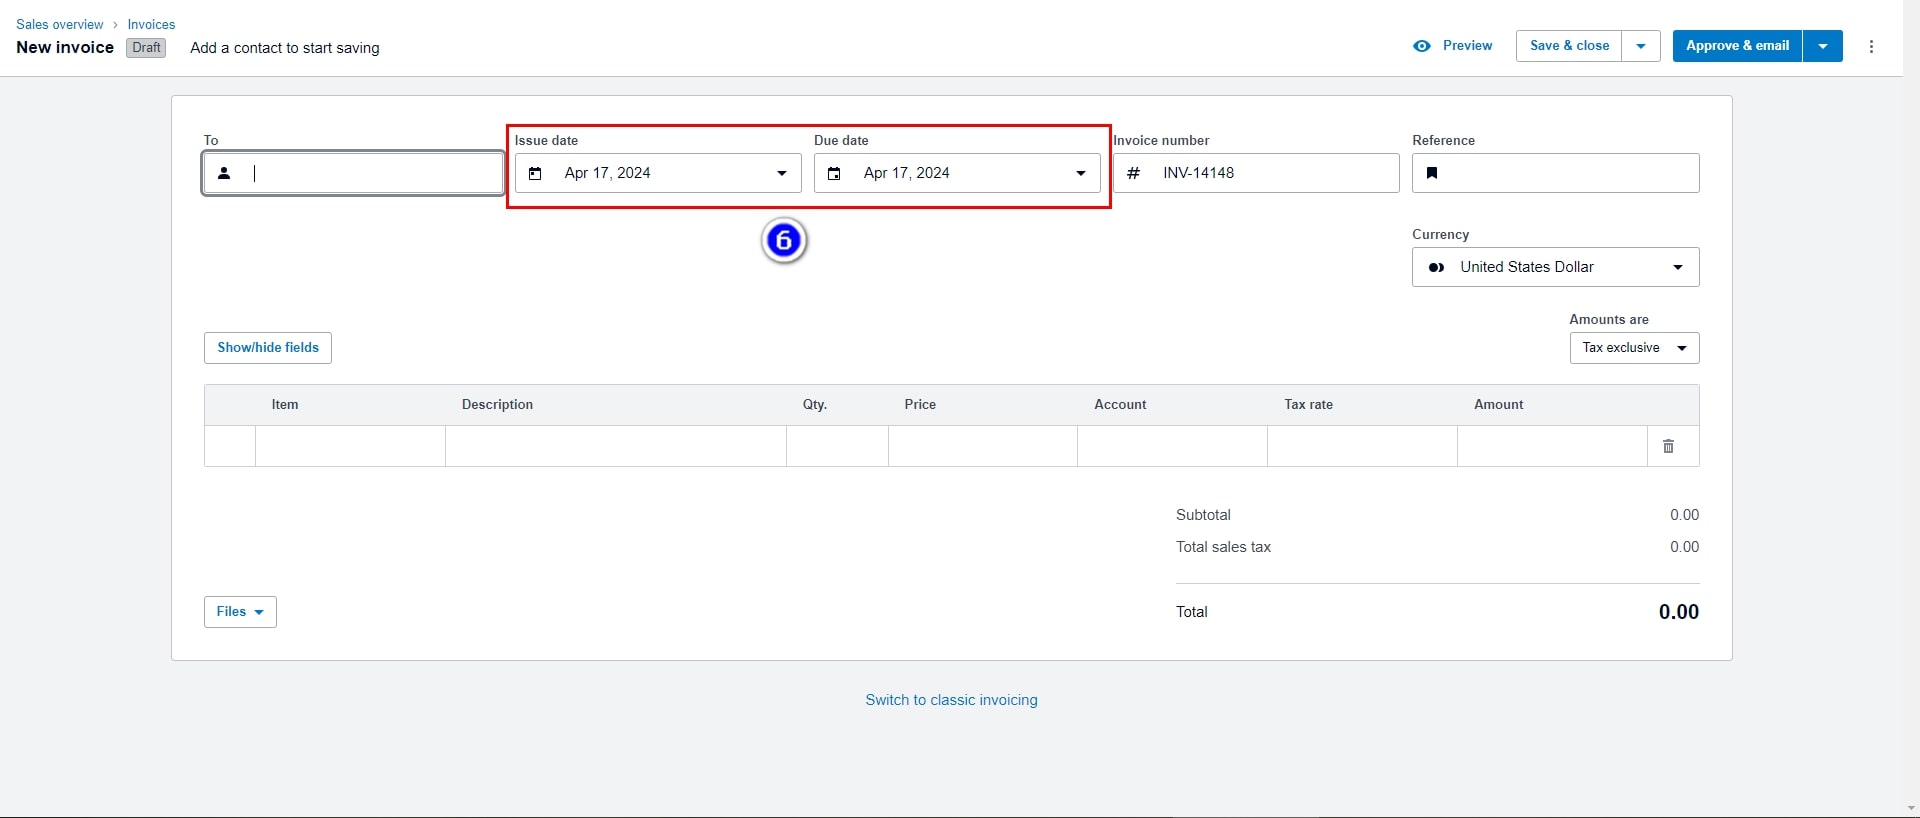
7) Xero, the cloud-based accounting software, streamlines invoicing processes by assigning unique alphanumeric numbers to each new invoice generated within its platform. This alphanumeric identifier serves as a distinct reference point, facilitating efficient tracking and organization of financial transactions. By systematically allocating these numbers, Xero ensures clarity and accuracy in record-keeping, which is crucial for businesses to maintain financial transparency and compliance.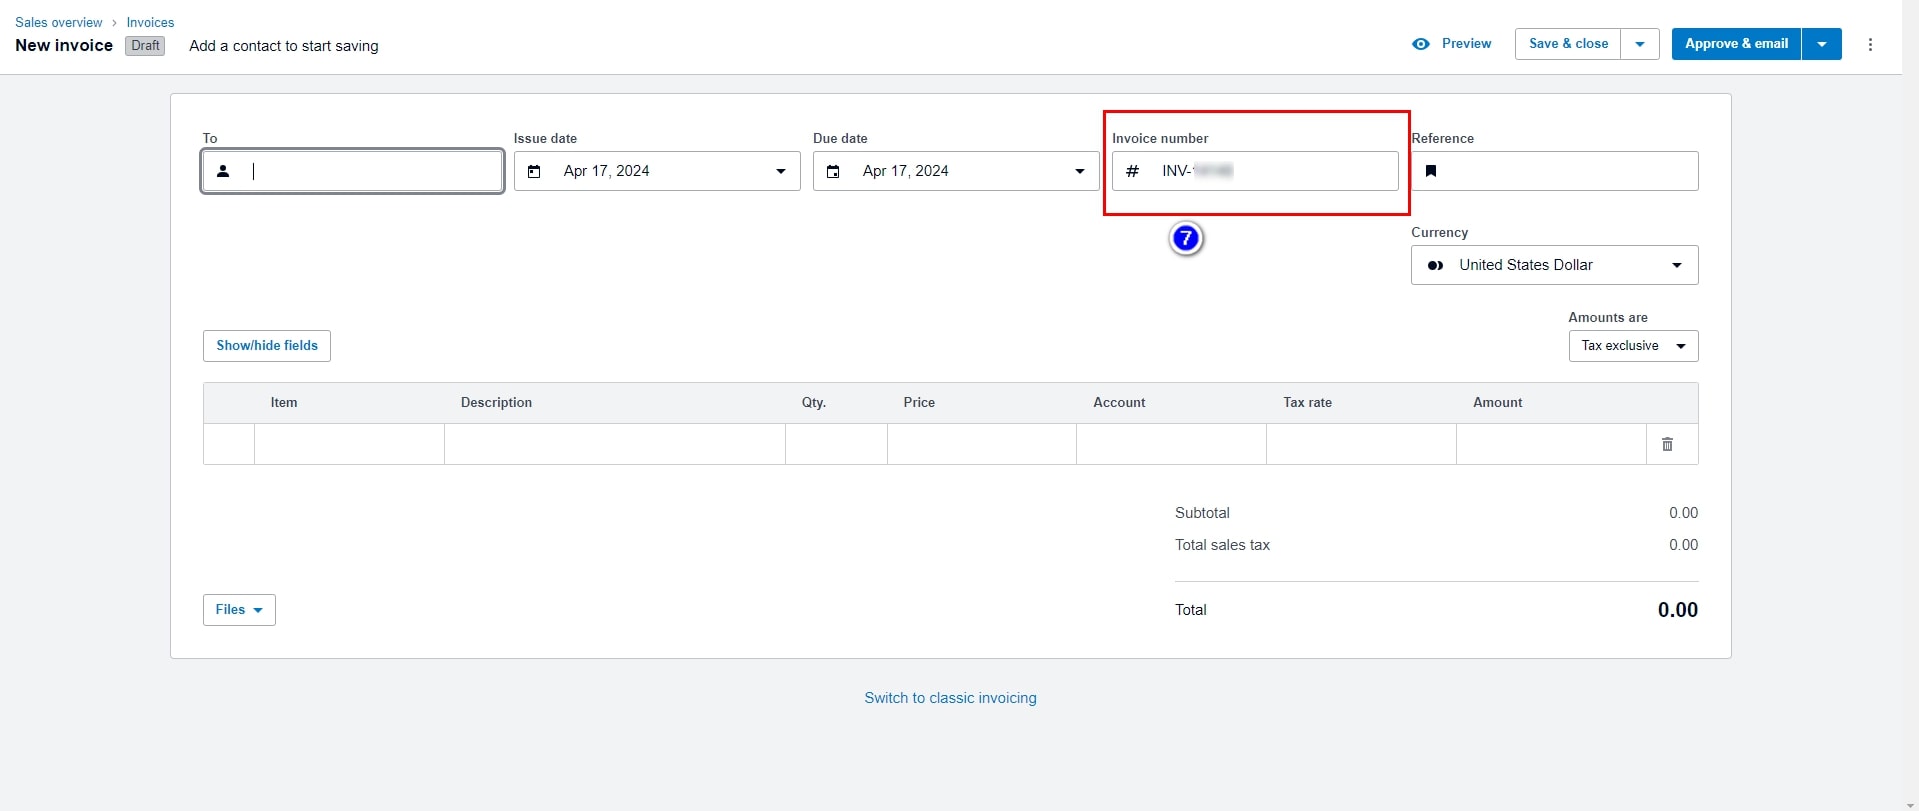
8) we need to input the Reference number, which can be the PO number or any other identification you wish to include for the Purchase Order.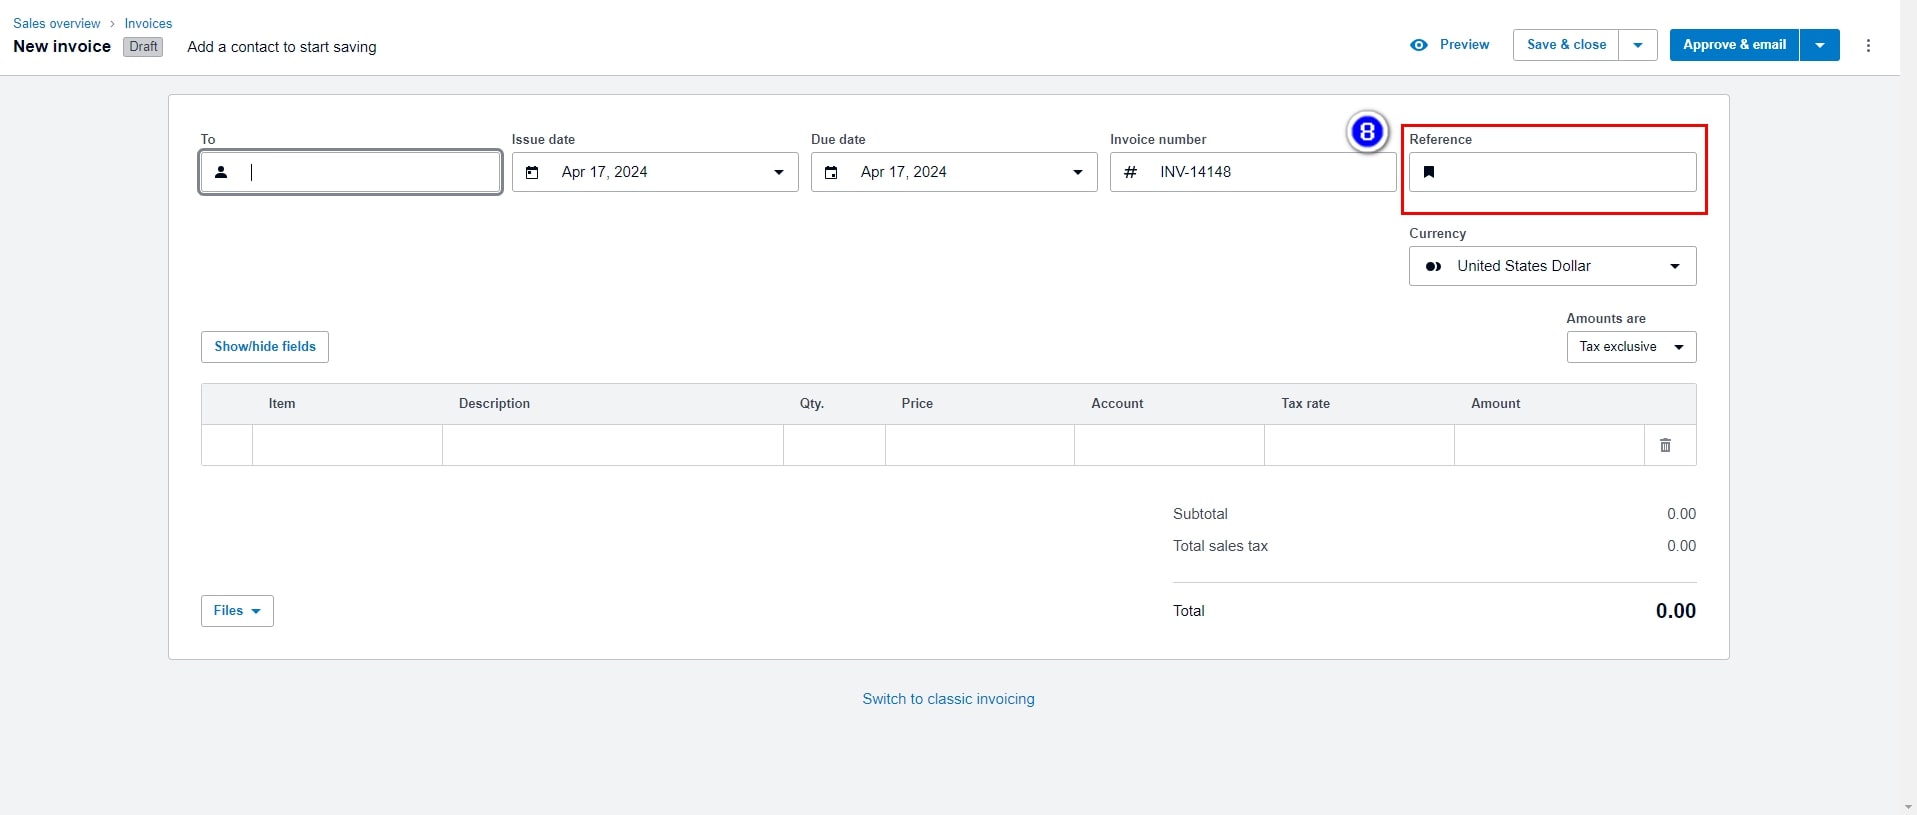
9) In Xero, users benefit from the flexibility to select their preferred currency when generating invoices, catering to the diverse needs of businesses operating across various regions and markets. This feature enables seamless international transactions by allowing invoices to be issued in the currency most relevant to the client or vendor, facilitating clarity and transparency in financial dealings. As illustrated in the image below, we can select the currency we prefer to use.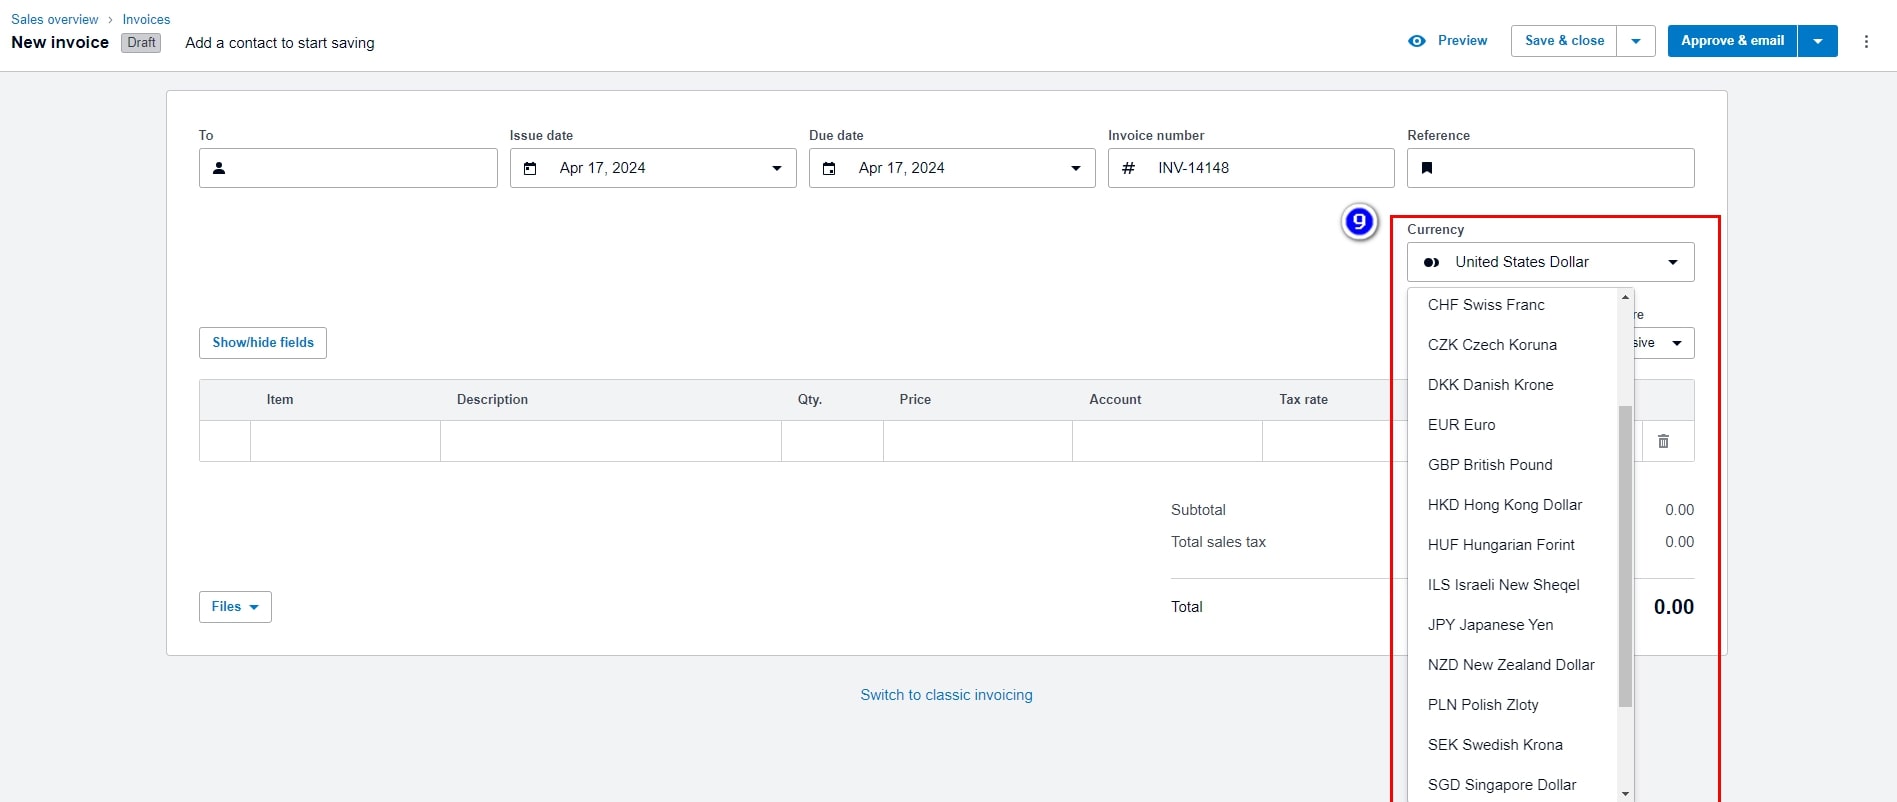
10) Now, we need to include the products in the invoice. We can search for the product by SKU or name in the Items field. It’s important to note that all products must be added to the inventory beforehand.
11) Xero automatically showcases the product name alongside its corresponding SKU (Stock Keeping Unit) within the Description field. This dynamic feature not only streamlines the invoicing process but also enhances transparency and accuracy in inventory management.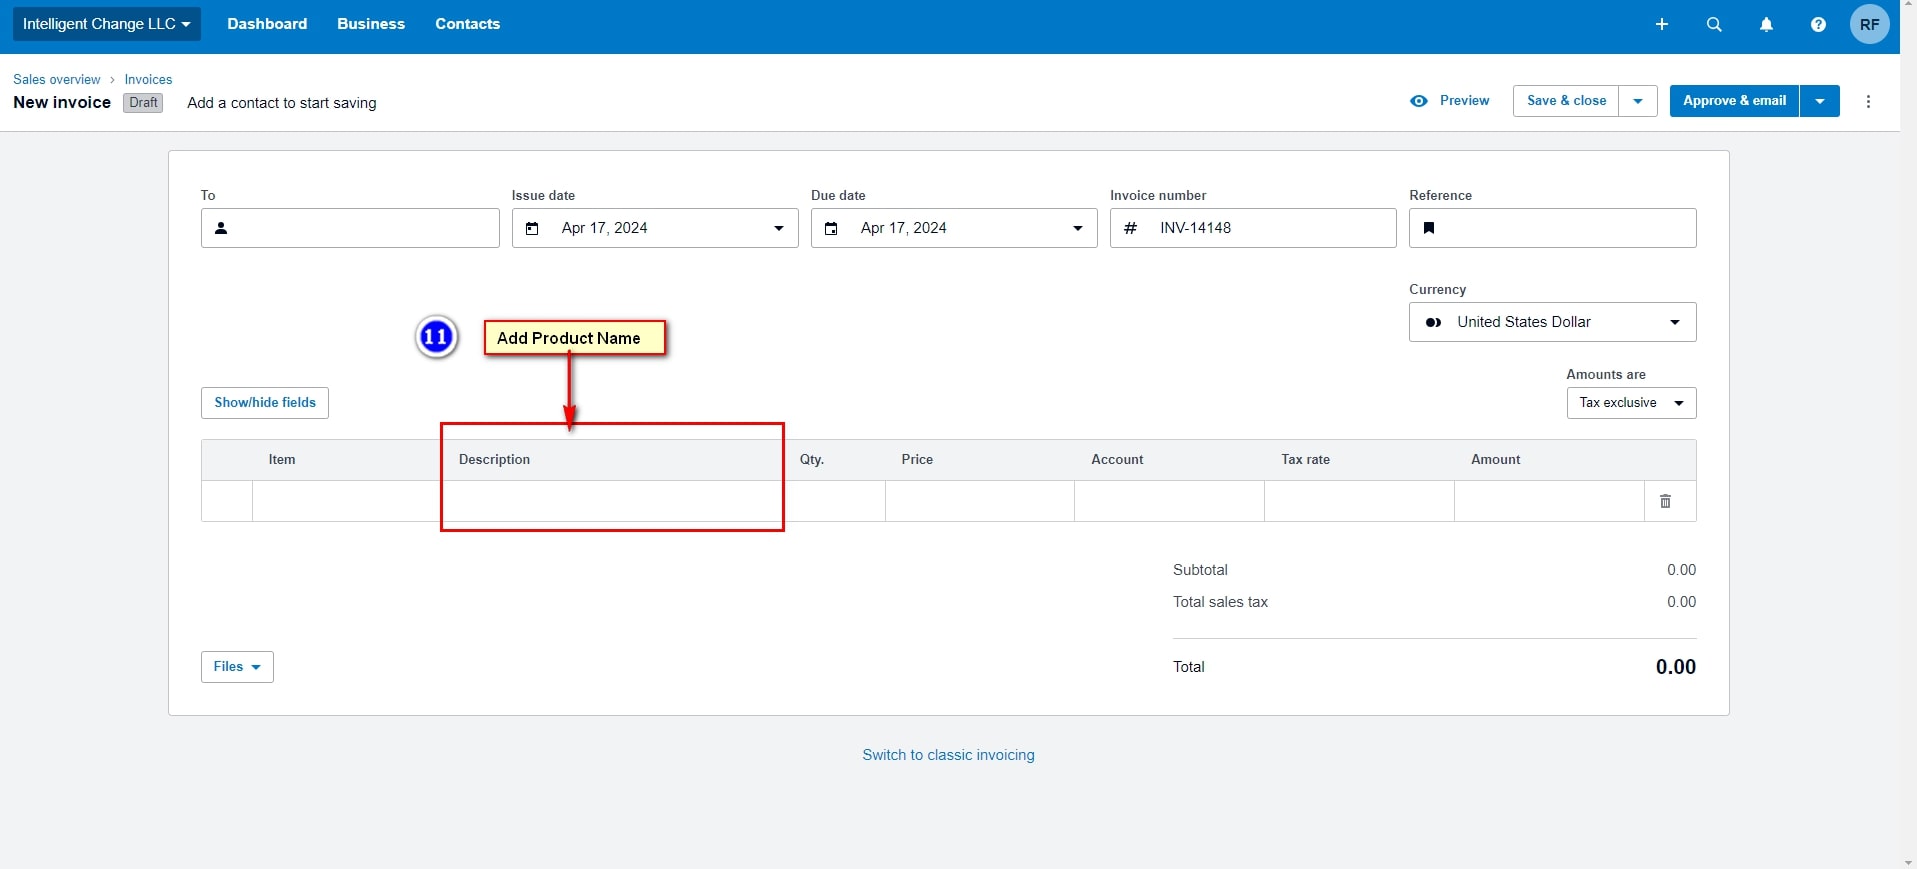
12) In the Account field, we must choose the currency to be used for the invoice. For instance, when creating an invoice for a UK account, we would include the Retailer Sales – UK account, as a United Kingdom (20%) VAT is consistently applicable for shipments to the UK. However, if the product is being shipped to Retailer Sales – US, the Tax rate is usually Tax Exempt (0%). Nevertheless, this might vary depending on the charges we wish to apply to the Purchase Order.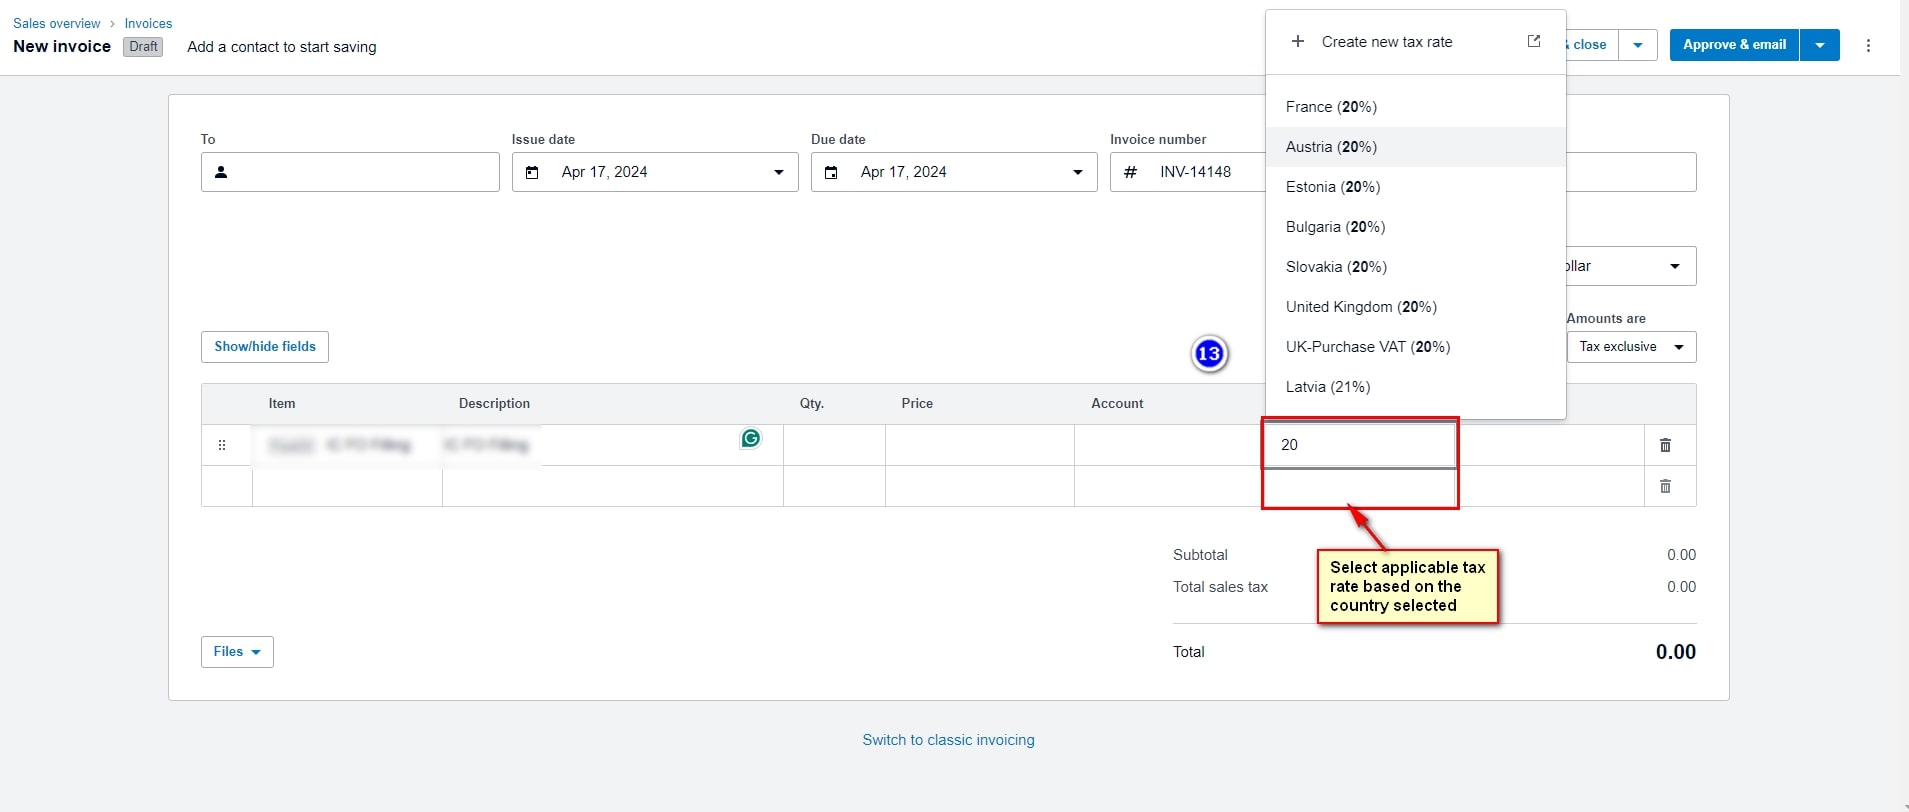
13 Xero allows users to incorporate the applicable tax for the shipping destination directly from the Tax Rate field on the invoice. This feature streamlines the invoicing process by seamlessly integrating tax assessment with shipping details, eliminating the need for manual adjustments or separate calculations. By leveraging the Tax Rate field, users can accurately apply regional tax rates based on the shipping destination, thereby facilitating precise invoicing and reducing the risk of errors. 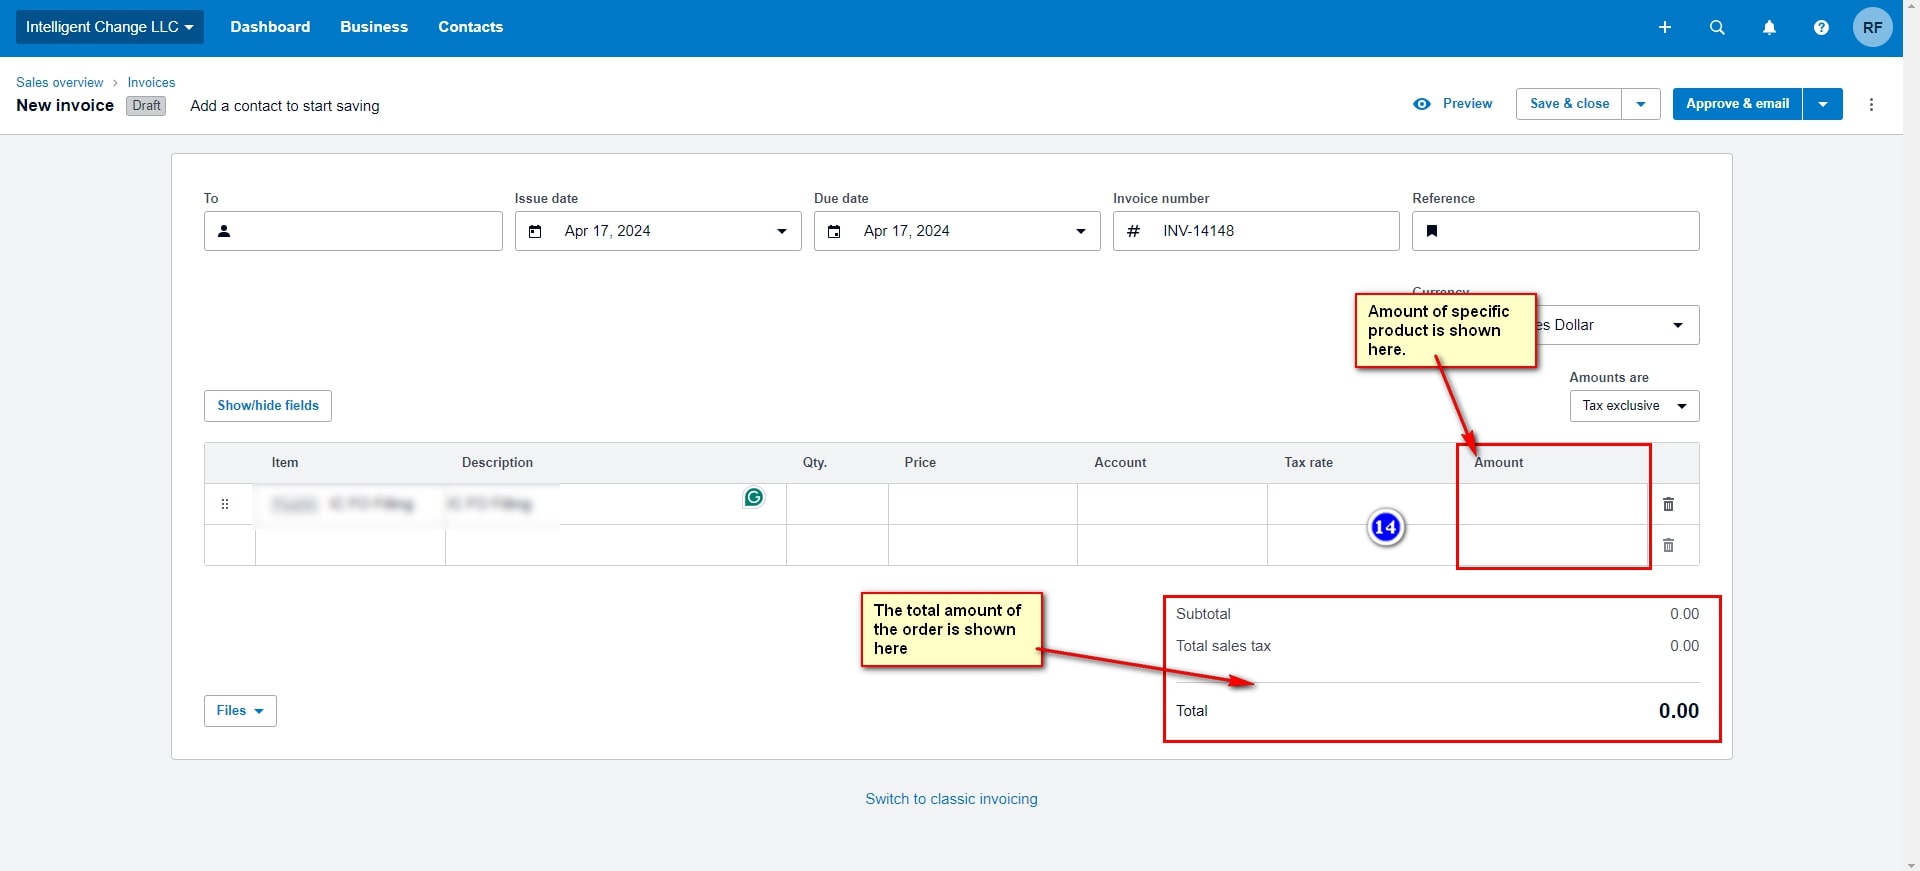
14) The final amount will be displayed after inputting all the details into the invoice, as depicted in the image below. The total amount for each product and the overall invoice total will be presented at the bottom of the invoice.
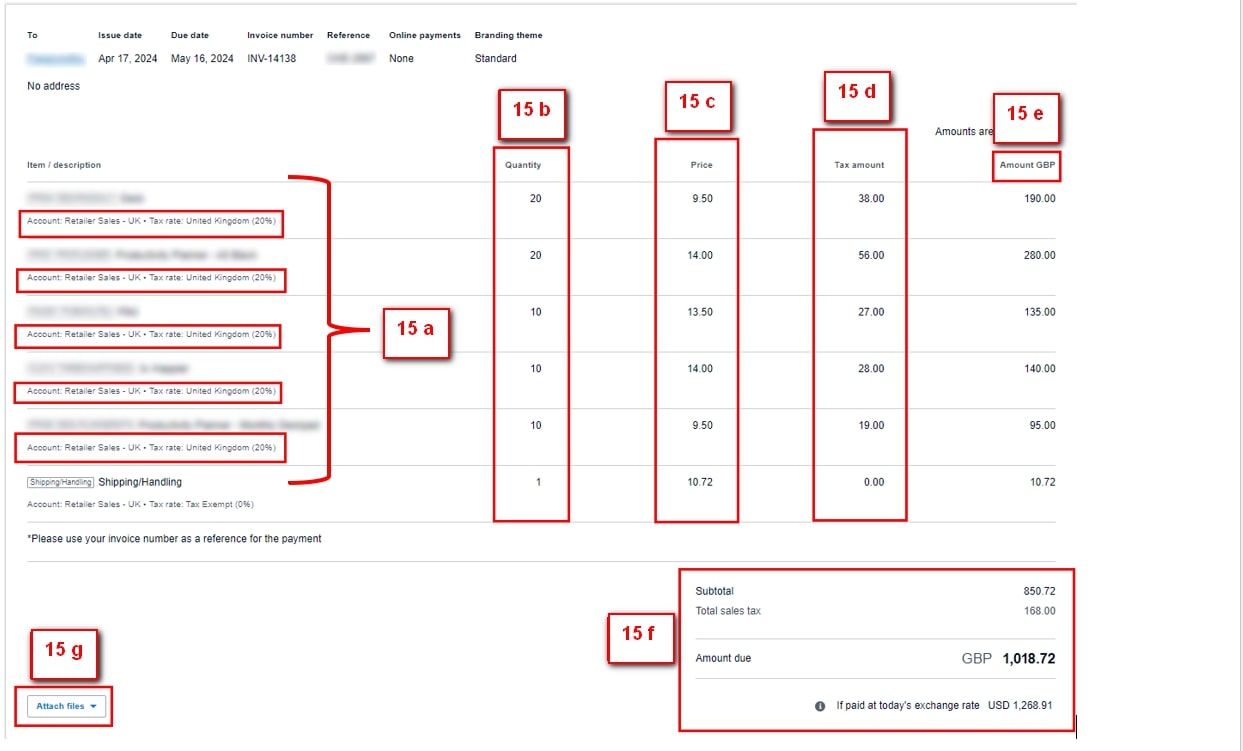
15) The completed invoice will appear in this format, featuring the item’s SKU/Description, the selected currency, quantity, unit price, total amount for each product, subtotal of the invoice, total applicable tax, and an option to attach files if we wish to include the PO on the invoice.
- SKU/Description: In this field, both the SKU and a concise product description are presented for items included in the invoice.
- Quantity: This field displays the quantity of ordered products.
- Unit Price: This field displays the unit price of the product.
- Tax Amount: This field displays the applicable tax on the product.
- Amount: This file displays the total amount of the product (quantity multiplied by unit price).
- Subtotal: This field displays the total of all individual products total.
- Attach File: If we want to add any proforma, quote, or PO, this field helps to add it to the invoice.

At StaffCloud, our team isn’t just skilled at creating invoices; they understand Xero inside and out. You can count on our experienced professionals to handle your invoicing needs with care and attention to detail. We’ll make sure every aspect is just right, so you can focus on what matters most to your business. For more information contact us today.